Audit Logging Configuration
The Audit Logging service records Kubernetes API-server audit events of a Shoot cluster and can forward them to an external log aggregator.
This page describes how to configure the service in the OSC Dashboard. For the audit policy format, the forwarding examples and the resulting manifest structure, see the Extension Shoot Kubernetes Audit Logs reference.
Unlike other cluster services, the Audit Logging dialog
uses a dedicated configuration component:
in addition to the configuration form,
it can create and manage the required ConfigMaps for you,
so no manual kubectl steps are needed.
Info
The service is enabled by default. Please note that if the service is actively disabled, the cluster will not record API-server audit events, resulting in a gap in the audit trail.
Configuring Audit Logging in the OSC Dashboard
- Open the Shoot detail page.
- Scroll to the Cluster Services section.
- Click the cog button next to Audit Logging.
During Shoot creation, the same dialog is available in the Cluster Services section of the new Shoot form.
The dialog is organised into three steps, shown as a button group above the form:
- Audit policy
- Forwarding
- Configuration
When the service is not yet configured, the dialog opens on Audit policy; otherwise it opens directly on Configuration.
Step 1: Audit policy
This step creates the ConfigMap containing the audit policy, which defines what API-server events are recorded.
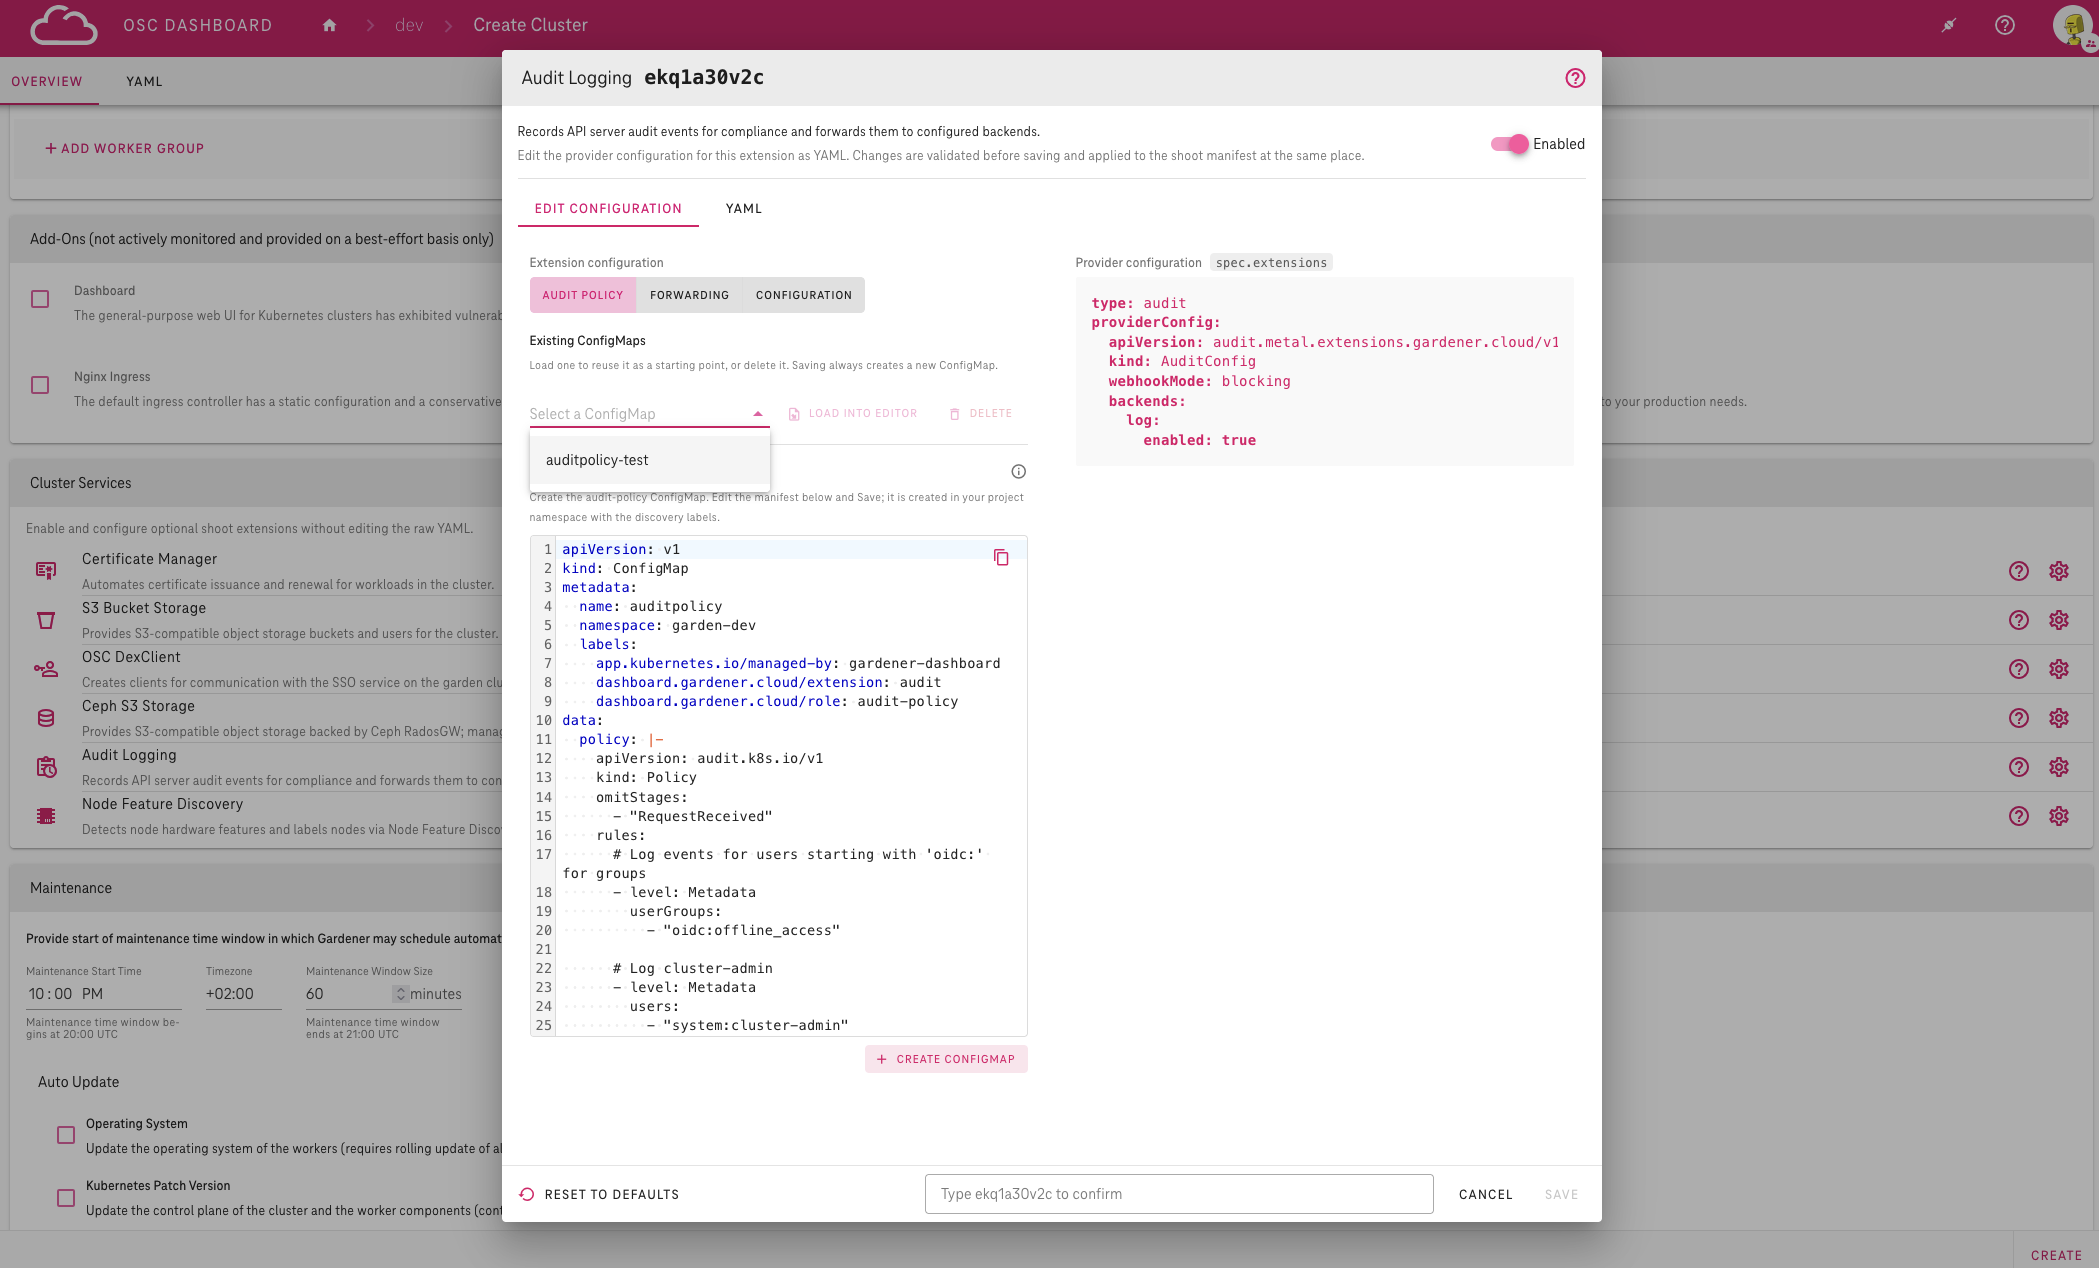
The Existing ConfigMaps section lists the audit-policy ConfigMaps already present in your project namespace:
- Load into editor: loads the selected ConfigMap into the editor
as a starting point.
The copy is renamed to
<name>-copy, because saving always creates a new ConfigMap. - Delete: deletes the selected ConfigMap after confirmation. A warning appears if the current configuration references the ConfigMap.
The editor below is prefilled with a working default policy. Adjust the manifest as needed and click Create ConfigMap — the ConfigMap is created in your project namespace and labelled so the OSC Dashboard can find it again later. The editor validates the manifest before creation and explains any problem directly at the affected input.
Step 2: Forwarding (optional)
Custom forwarding sends the audit logs to an external system using a Fluent Bit output configuration.
Info
This step is only needed if you want to forward logs; otherwise continue with Configuration.
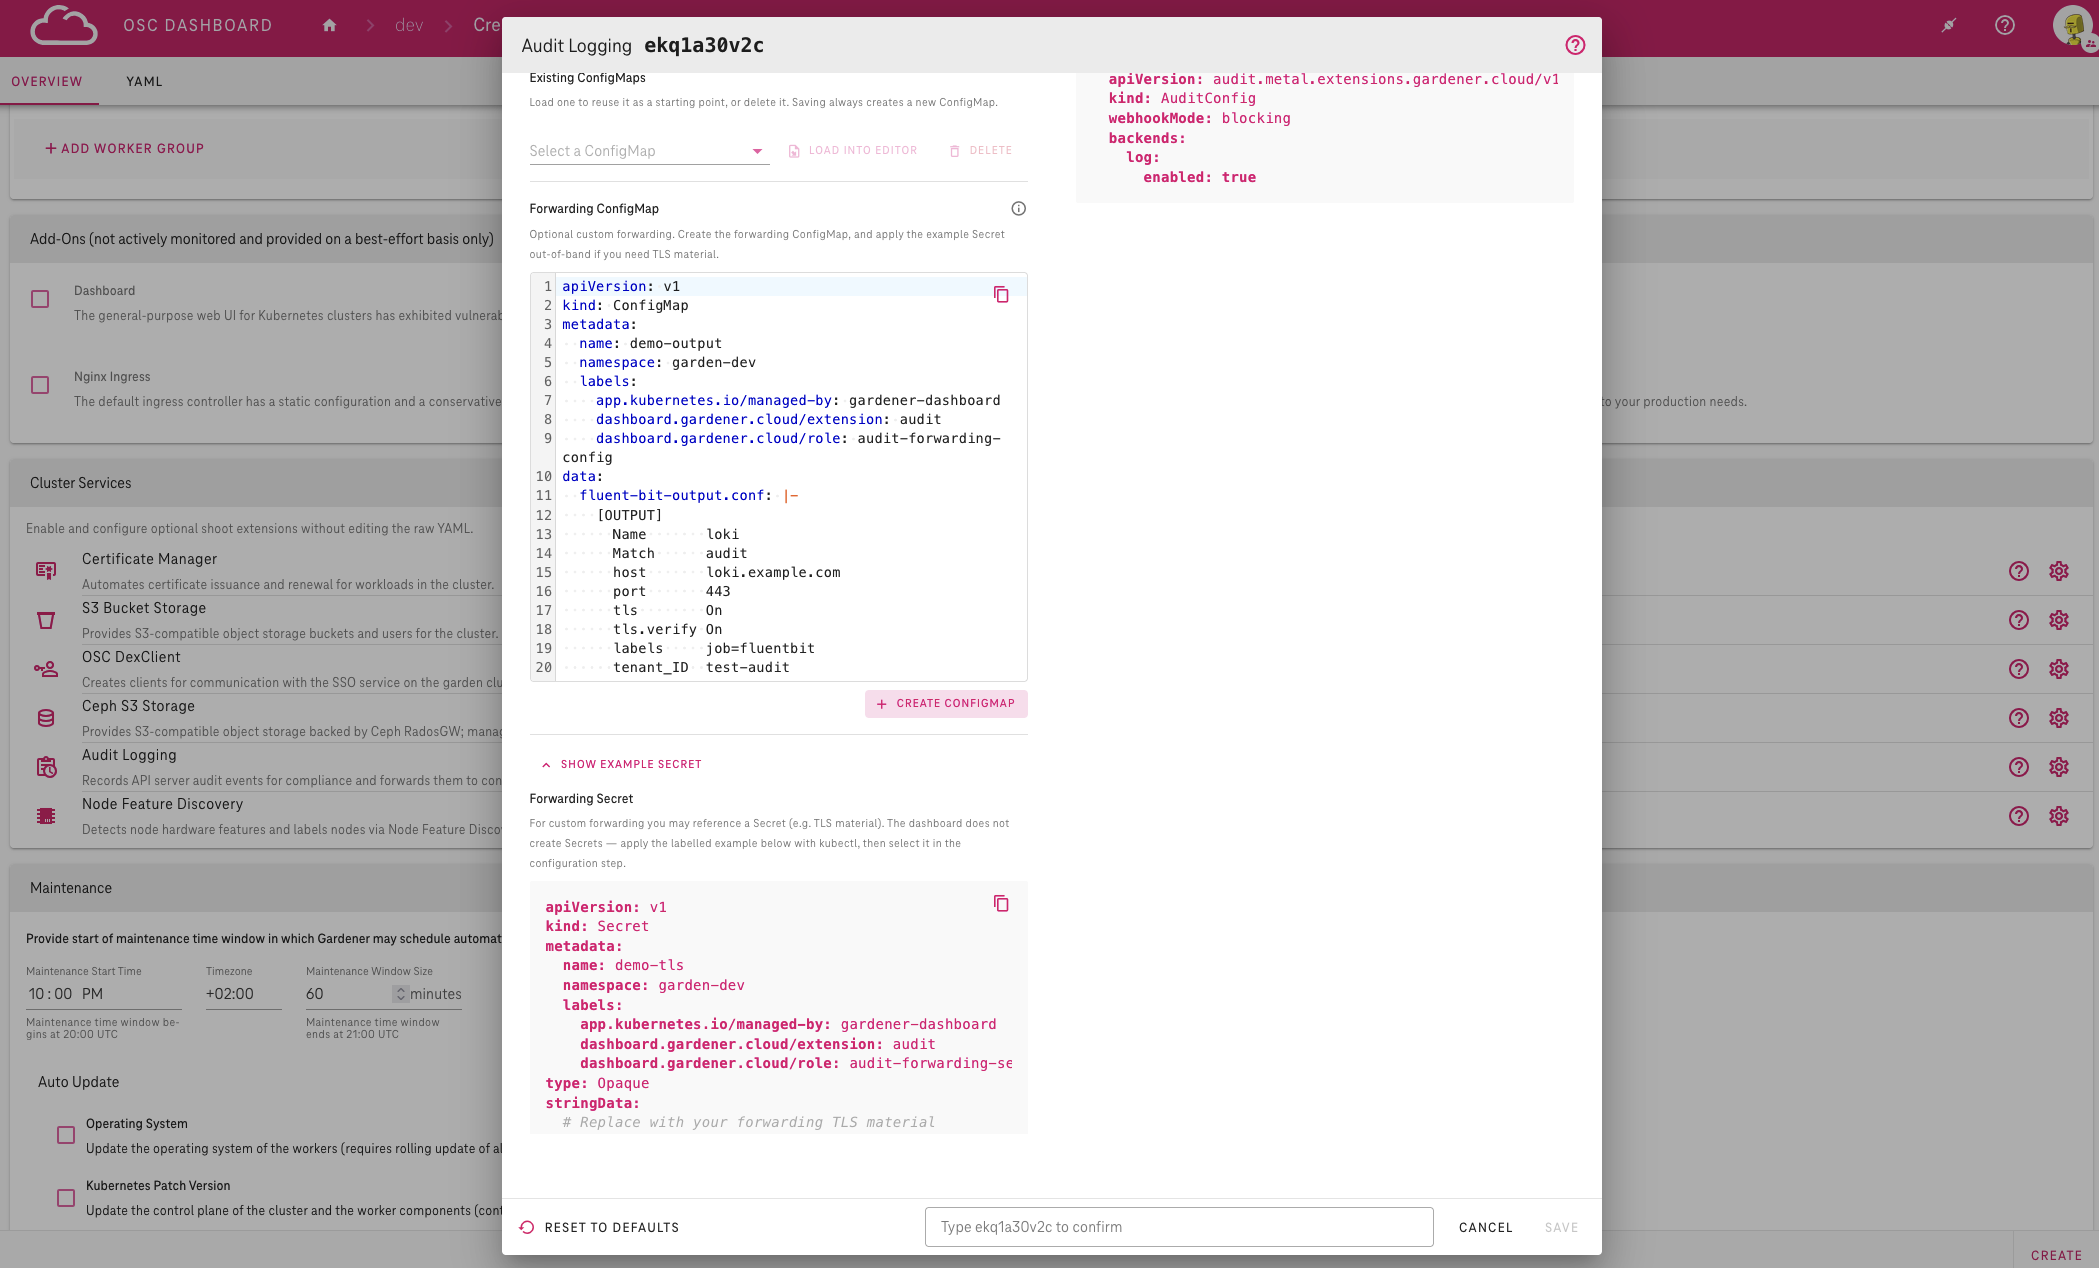
The step works like the audit-policy step. It offers:
- an Existing ConfigMaps section for reuse or deletion
- an editor prefilled with an example Fluent Bit output configuration
To forward logs:
- Adjust the prefilled example configuration in the editor.
- Click Create ConfigMap.
- If the forwarding target requires TLS material, click Show example Secret to display a labelled example Secret.
Note
The OSC Dashboard does not create Secrets.
- Copy the example.
- Fill in your certificate data.
- Apply it with
kubectlin your project namespace.
You can then select the Secret in the Configuration step.
Step 3: Configuration
The final step configures the audit extension itself.
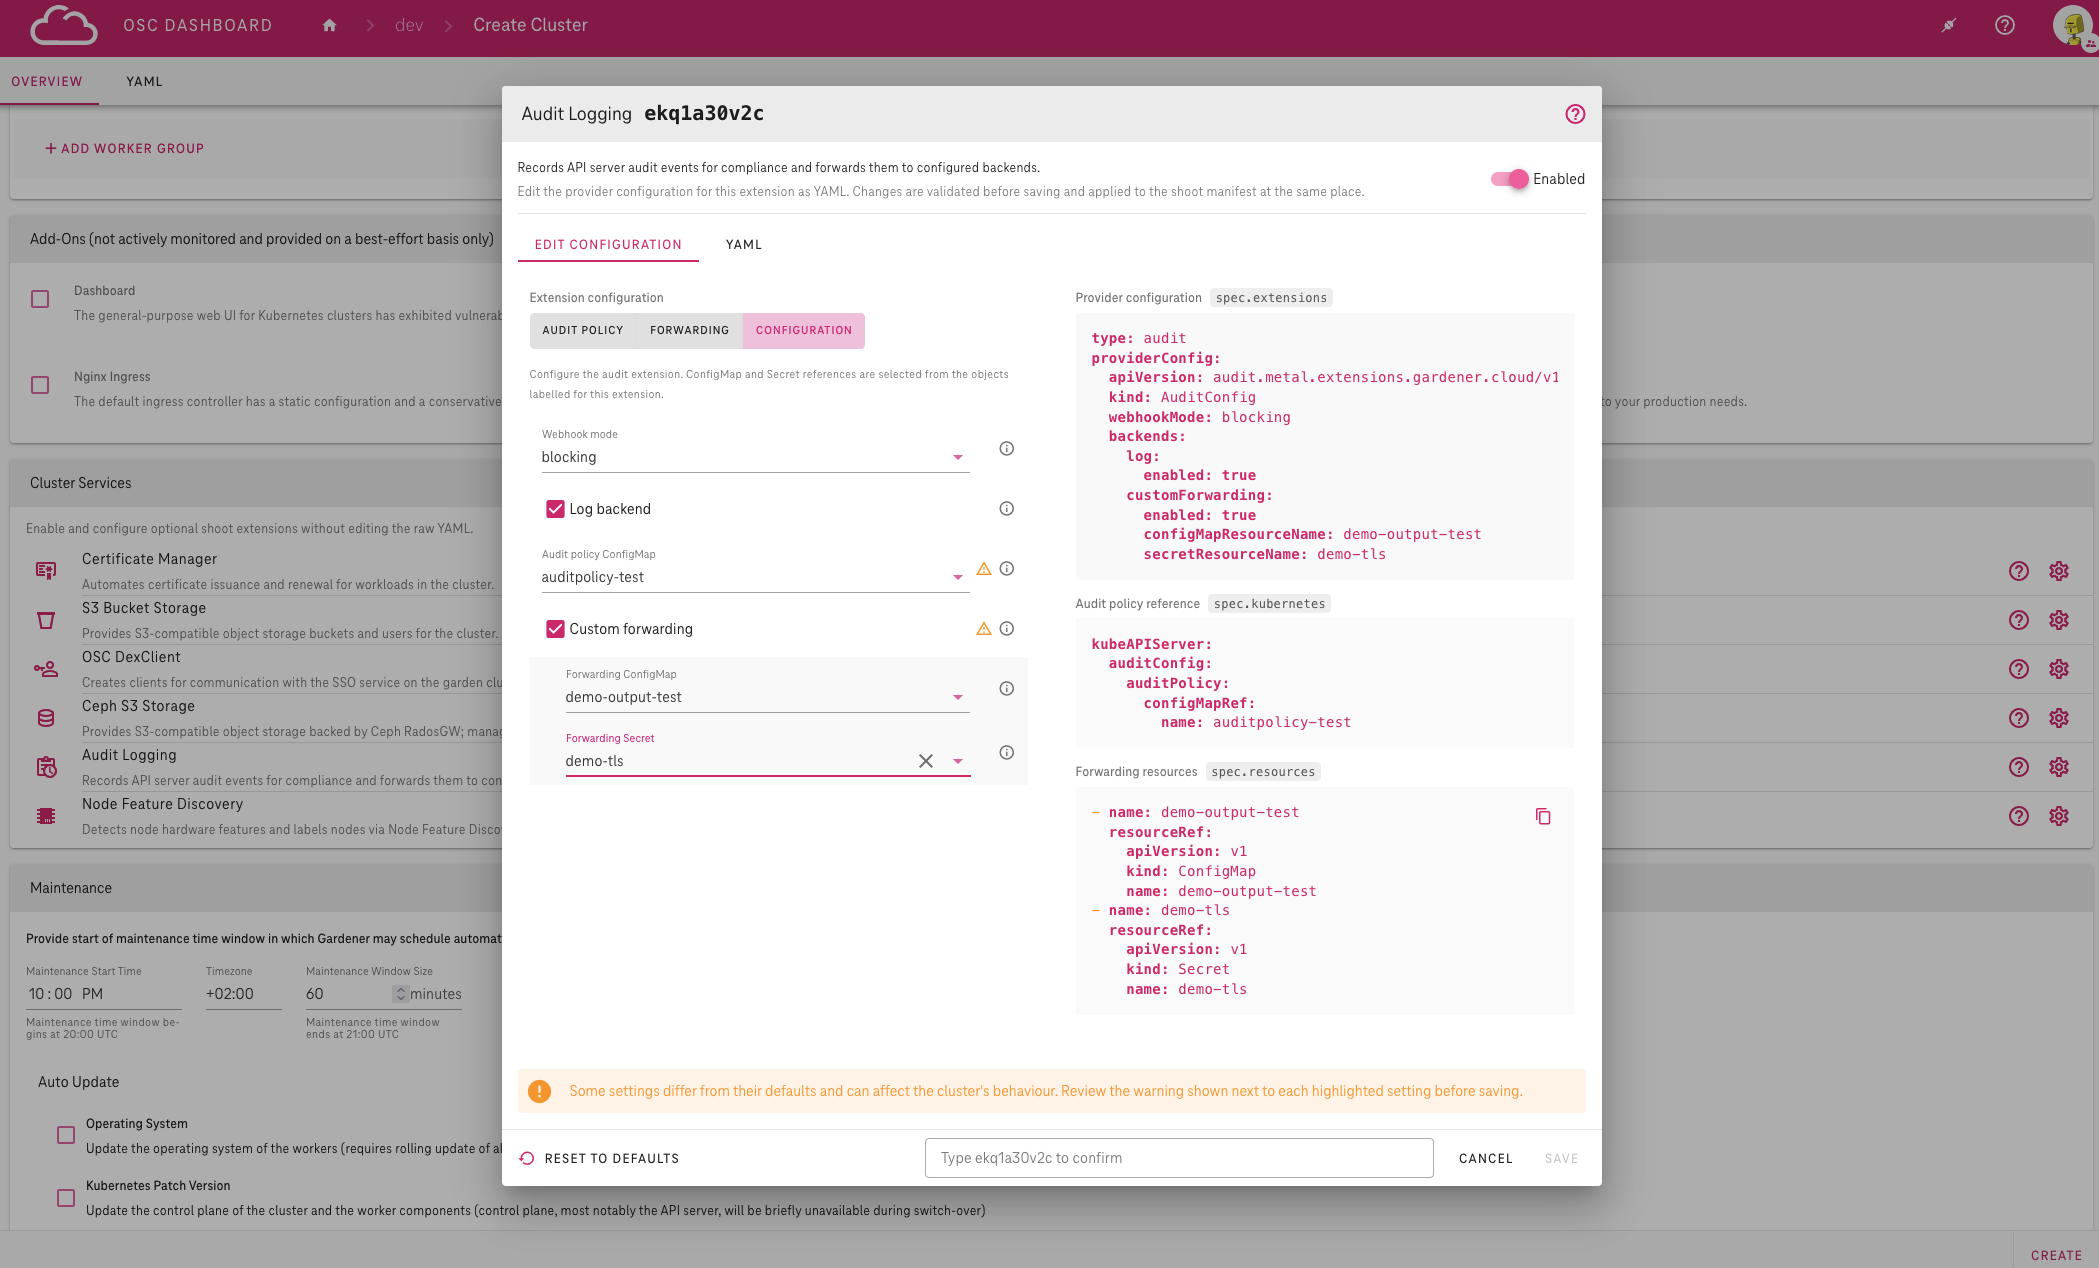
Webhook mode: delivery mode of the audit webhook.Log backend: enables the log backend output.Audit policy ConfigMap: the audit policy created in step 1. If none exists yet, an alert with a Create in step 1 button is shown.Custom forwarding: enables custom Fluent Bit forwarding and reveals theForwarding ConfigMapandForwarding Secretfields for the objects from step 2.
- Hover over the help icon next to each field to see its type, allowed values and an example.
- Review the Provider configuration preview on the right — it shows every part of the manifest the dialog will write.
- Type the Shoot name into the confirmation field.
- Click Save.
Referencing a ConfigMap or Secret by name
If you have not created any ConfigMap through the dialog, you can simply type a custom name into the field instead — the drop-downs only list objects carrying the OSC Dashboard's discovery labels, but any name can be entered as a custom value. In that case the ConfigMap (or Secret) must have been created in your project namespace before you save the configuration — the OSC Dashboard does not create or verify it, and a missing resource will break the audit extension.
Discovery labels
The OSC Dashboard finds the audit objects through these labels,
stamped automatically when a ConfigMap is created in the dialog.
Add them to objects created with kubectl
if you want them to appear in the drop-downs:
| Label | Value |
|---|---|
app.kubernetes.io/managed-by |
gardener-dashboard |
dashboard.gardener.cloud/extension |
audit |
dashboard.gardener.cloud/role |
audit-policy, audit-forwarding-config or audit-forwarding-secret |
For the full extension specification, the default audit policy and the forwarding examples, see the Extension Shoot Kubernetes Audit Logs reference.