DNS Management
Overview
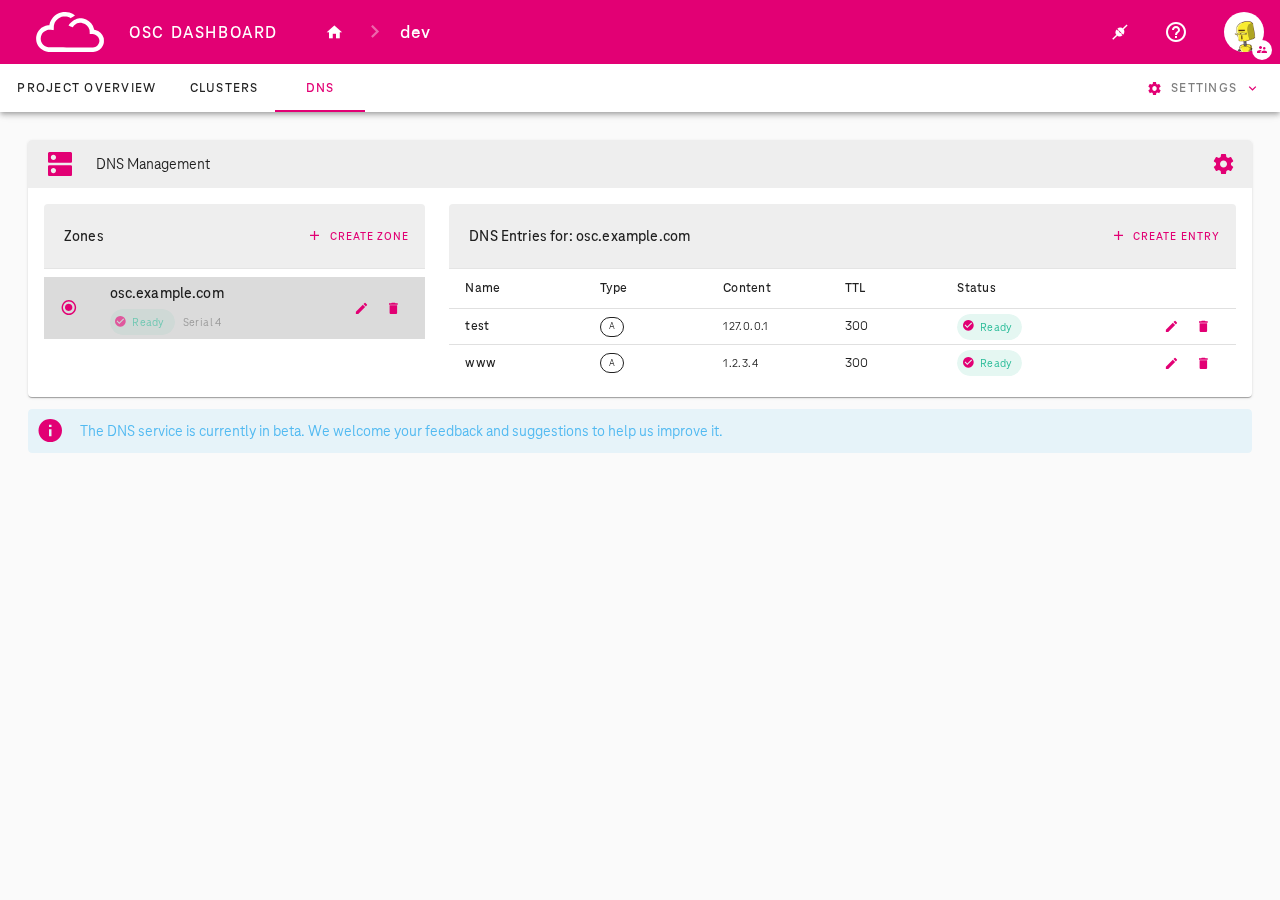
OSC provides a built-in DNS service for managing DNS zones and records at the project level. The DNS Management feature is accessible via the DNS tab in the OSC Dashboard and allows you to:
- Create and manage DNS zones (domain namespaces)
- Add DNS entries (A, AAAA, CNAME, TXT, MX, SRV records) to your zones
- Configure DNS deployment mode (private or public)
- Integrate your DNS zones with shoot clusters as DNS providers
Beta
The DNS service is currently in beta. We welcome your feedback and suggestions to help us improve it.
Prerequisites
- Access to the OSC Dashboard with project permissions
- For kubectl operations:
kubectlconfigured with access to the garden cluster
DNS Configuration
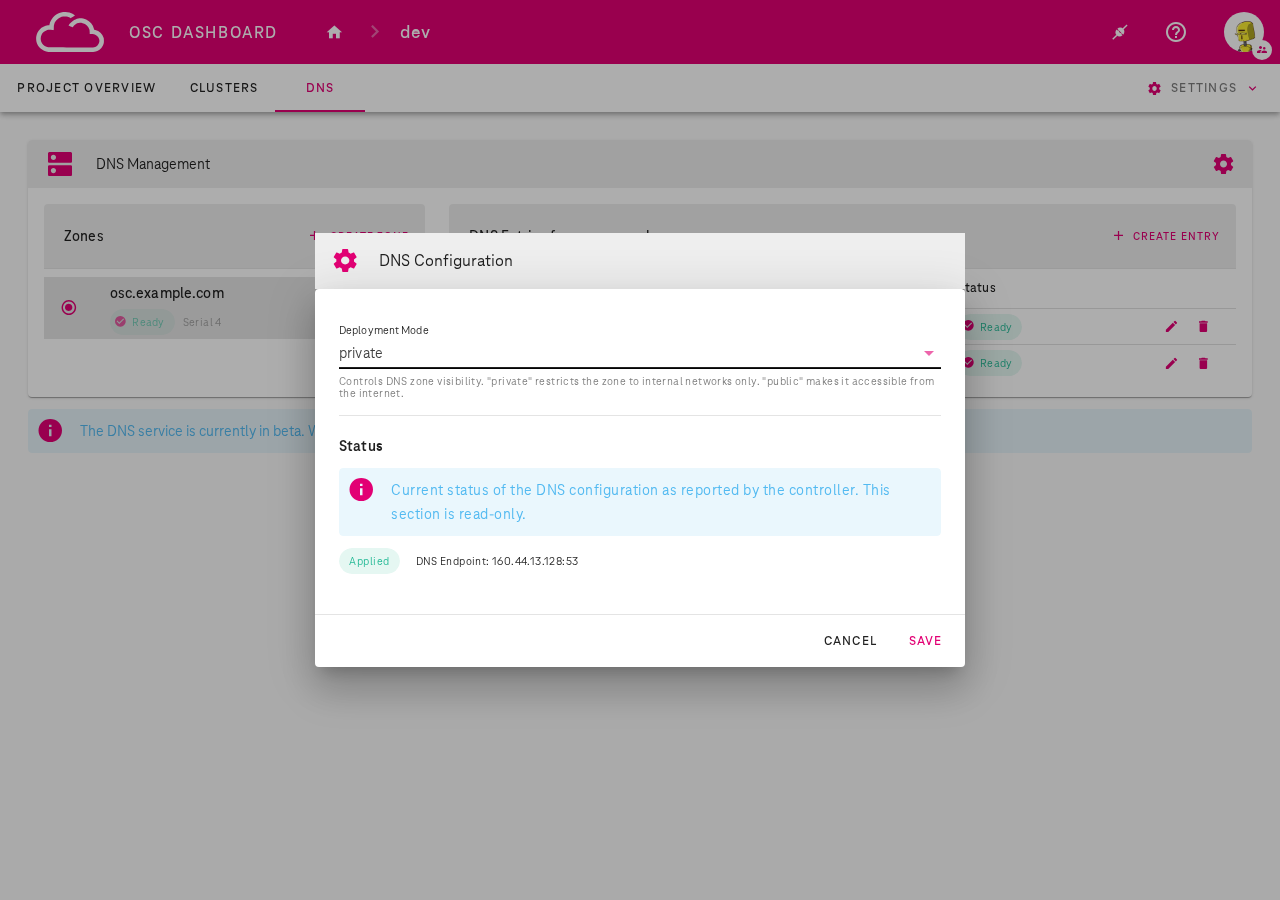
The DNS configuration is a cluster-scoped resource managed per garden cluster (not per project). It controls the deployment mode and additional settings for the DNS service.
To open the DNS Configuration dialog, click the gear icon in the DNS Management toolbar.
Deployment Modes
- private (default): DNS zones are only accessible within the garden cluster internal network. This mode is intended for private deployments where the garden cluster CIDR is peered with the customer's VRF or connected via VPN.
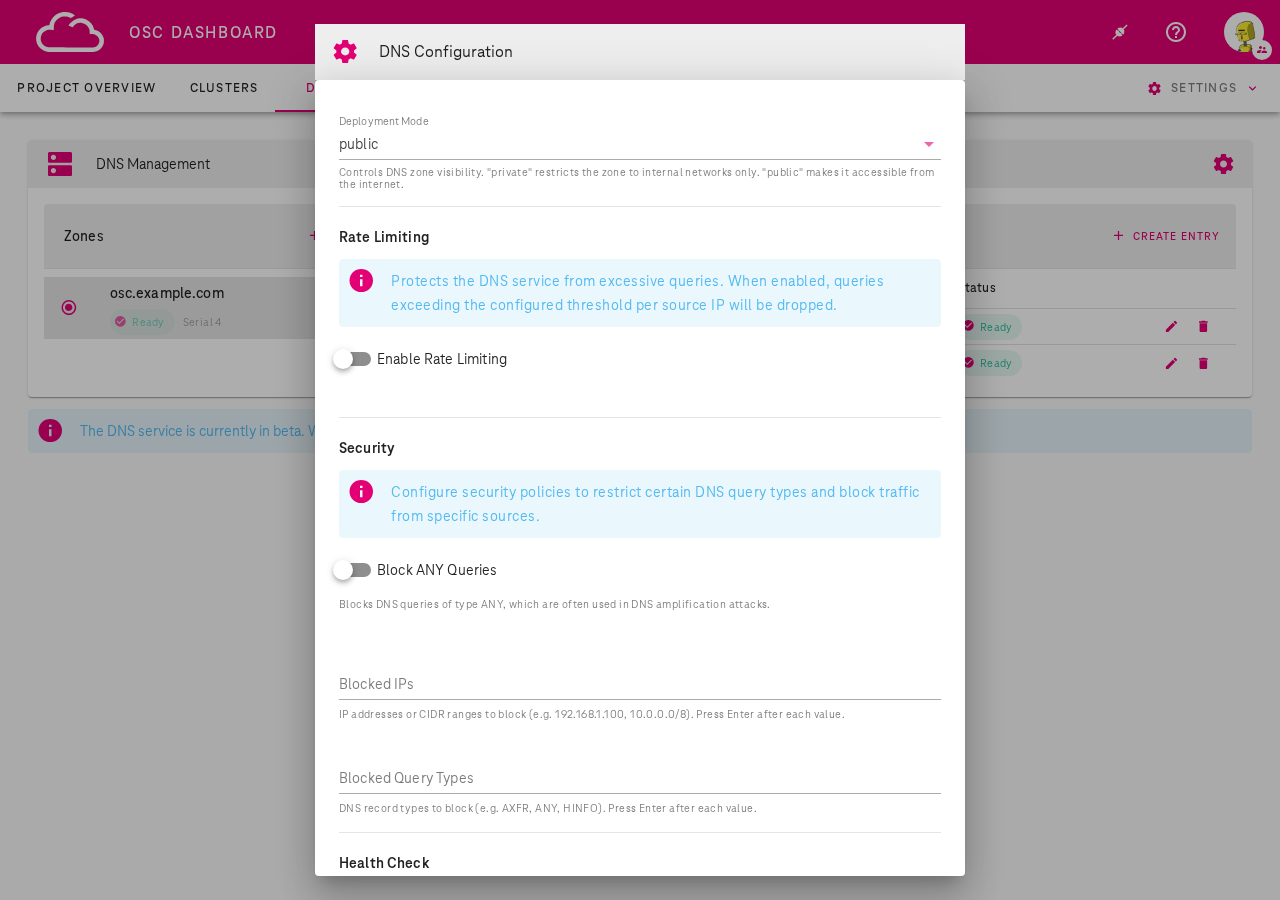
- public: DNS zones are resolvable from the internet
When set to public mode, additional settings become available:
- Rate Limiting: Protects the DNS service from excessive queries. When enabled, queries exceeding the configured threshold per source IP will be dropped.
- Security: Configure security policies to restrict certain DNS query types and block traffic from specific sources (Block ANY queries, Blocked IPs, Blocked Query Types).
- Health Check: Configure health check interval, timeout, and failure threshold for DNS backend monitoring.
kubectl
View the current DNS configuration:
kubectl get dnsconfig default -o yaml
Example DNSConfig resource:
apiVersion: dns.osc.t-systems.com/v1
kind: DNSConfig
metadata:
  name: default
spec:
  deploymentMode: private  # "private" (default) or "public"
Update the deployment mode:
kubectl patch dnsconfig default --type merge -p '{"spec":{"deploymentMode":"public"}}'
Managing DNS Zones
Via OSC Dashboard
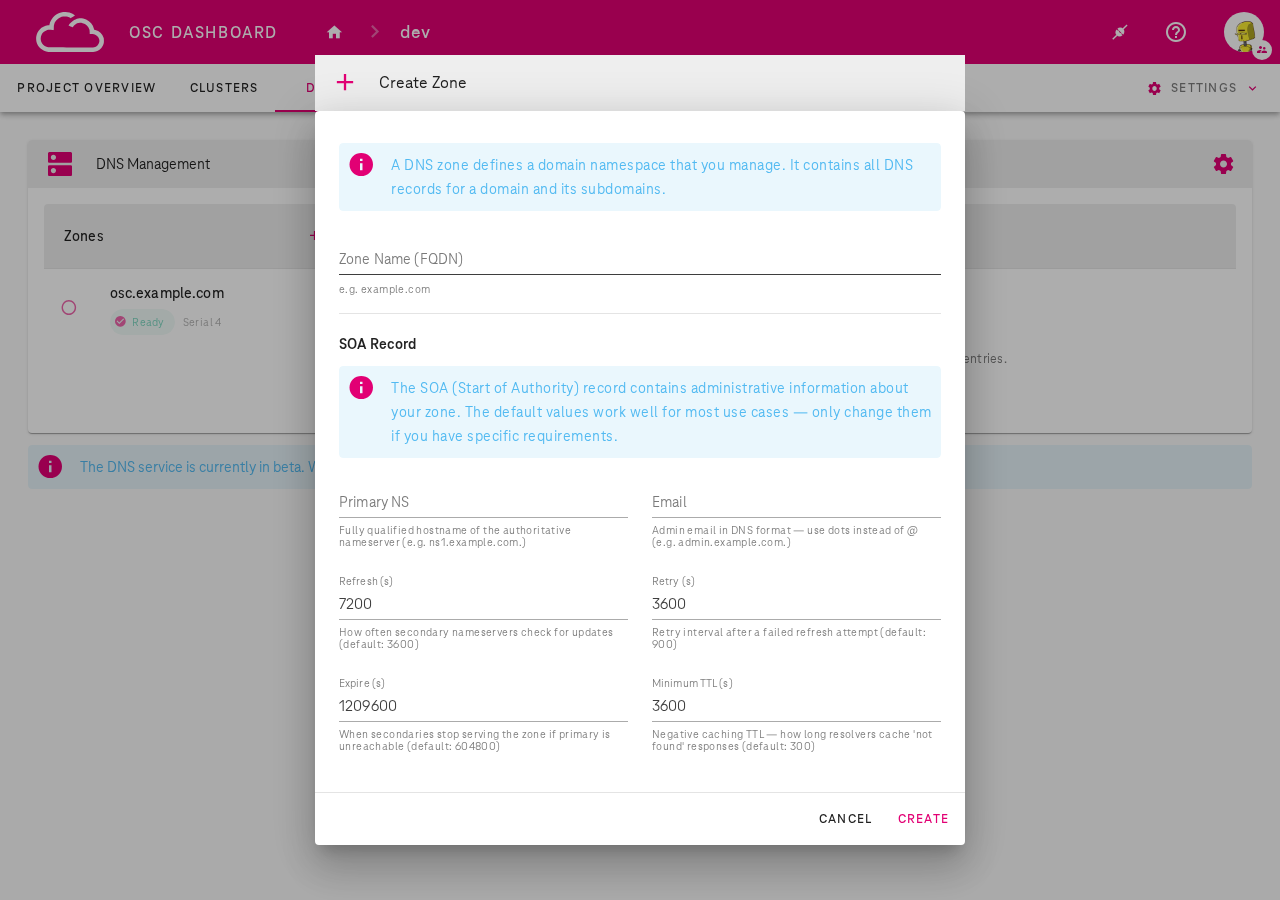
- Navigate to the DNS tab in your project
- Click + Create Zone
- Enter the Zone Name (FQDN) — for example
osc.example.com - Optionally configure the SOA Record settings (Primary NS, Email, Refresh, Retry, Expire, Minimum TTL). The defaults work well for most use cases.
- Click Create
Once created, the zone appears in the left panel with its status:
- Ready: Zone is active and serving DNS
- Pending: Zone is being provisioned
- Error: Zone creation or update failed
Via kubectl
List zones in a project:
kubectl get zones -n garden-<project>
Create a zone:
apiVersion: dns.osc.t-systems.com/v1
kind: Zone
metadata:
  name: osc-example-com
  namespace: garden-dev
spec:
  name: osc.example.com
  soa:
    primaryNS: ns1.osc.example.com
    email: admin@osc.example.com
    refresh: 7200
    retry: 3600
    expire: 1209600
    minimumTTL: 3600
kubectl apply -f zone.yaml
Managing DNS Entries
Via OSC Dashboard
- Select a zone from the left panel
- Click + Create Entry in the right panel
- Fill in the form:
- Zone: Pre-selected based on current zone
- Name: Subdomain (e.g.
www) or@for the zone apex - Type: Record type — A, AAAA, CNAME, TXT, MX, or SRV - Content: The record value (e.g. an IP address for A records). Press Enter after each value for multiple entries. - TTL (seconds): Time to live (default: 3600, minimum: 0) - Click Create
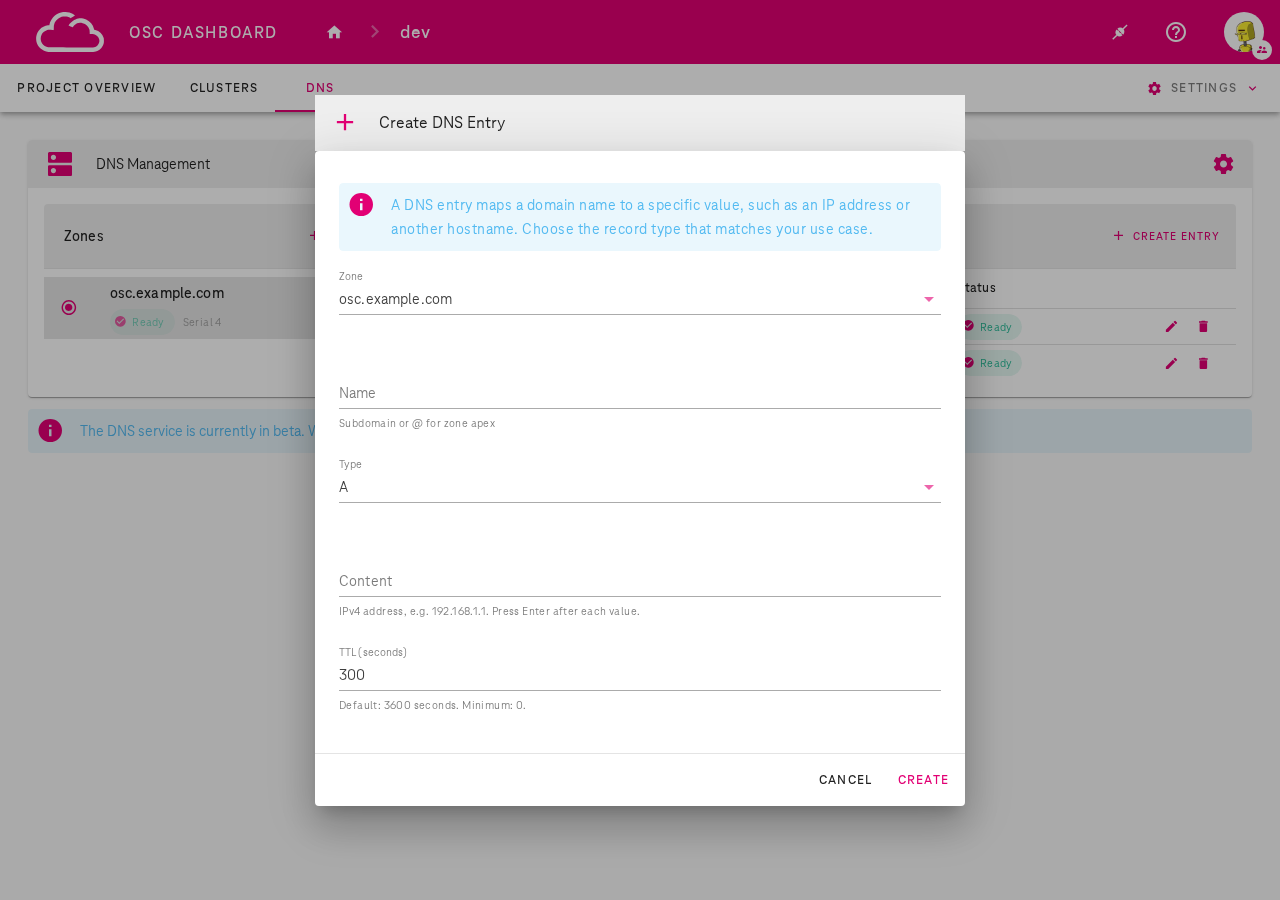
Existing entries can be edited or deleted using the pencil and trash icons in the entries table.
Via kubectl
List DNS entries in a project:
kubectl get dnsentries -n garden-<project>
Create a DNS entry:
apiVersion: dns.osc.t-systems.com/v1
kind: DNSEntry
metadata:
  name: www-osc-example-com-a
  namespace: garden-dev
spec:
  zone: osc.example.com
  name: www
  type: A
  content:
    - "1.2.3.4"
  ttl: 300
kubectl apply -f entry.yaml
NS Delegation (Public Mode)
When using public deployment mode, you can delegate a subdomain from your own domain to the OSC DNS service. This allows the DNS zones you manage in OSC to be resolvable from the internet under your own domain.
How it works
- You own a domain (e.g.
example.com) registered with an external registrar - You create a zone in OSC (e.g.
osc.example.com) - You add NS records at your registrar pointing
osc.example.comto the OSC DNS endpoint - DNS queries for
osc.example.comand its subdomains are then served by OSC
Step-by-step
- Create a zone in the OSC Dashboard (e.g.
osc.example.com) - Note the DNS endpoint from the DNS Configuration dialog (e.g.
160.44.13.128) -
At your domain registrar, add NS records for the subdomain:
osc.example.com. IN NS ns1.osc.example.com. ns1.osc.example.com. IN A 160.44.13.128 -
Verify delegation is working:
dig osc.example.com @160.44.13.128
Note
NS delegation at your domain registrar is your responsibility. OSC manages the authoritative DNS for the delegated zone, but the delegation itself must be configured by the domain owner.
Integration with Shoot Clusters
DNS zones created in the DNS Management tab can be used as DNS providers for shoot clusters.
This allows the shoot-dns-service extension to automatically manage DNS entries for services and ingresses deployed on the shoot cluster.
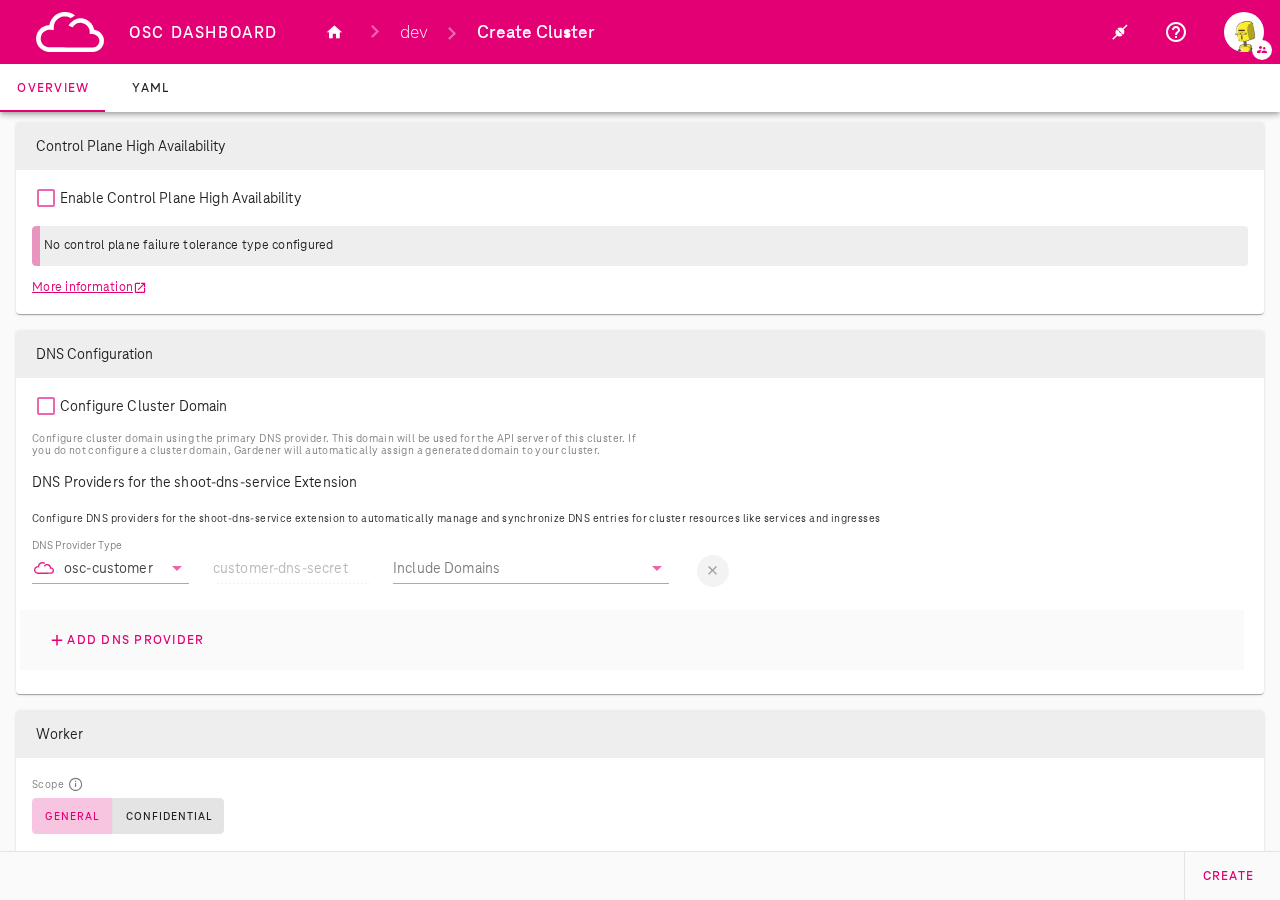
Adding a customer DNS provider to a shoot
During shoot creation (or when editing an existing shoot), in the DNS Configuration section:
- Click + Add DNS Provider
- Select osc-customer as the DNS Provider Type
- The credential field auto-fills with
customer-dns-secret(managed automatically) - Select the zones you want to use from the Include Domains dropdown
Important
See DNS provider support policy for important information about supported provider types and primary provider recommendations.
Via kubectl (Shoot YAML)
You can also configure the osc-customer DNS provider by editing the shoot manifest directly.
Two sections need to be added: the DNS provider under spec.dns.providers and the shoot-dns-service extension configuration under spec.extensions.
apiVersion: core.gardener.cloud/v1beta1
kind: Shoot
metadata:
  name: my-shoot
  namespace: garden-dev
spec:
  dns:
    domain: my-shoot.dev.gdps0.ffm.osc.live
    providers:
      - domains:
          include:
            - osc.example.com
        primary: false
        secretName: customer-dns-secret
        type: customer
  extensions:
    - type: shoot-dns-service
      providerConfig:
        apiVersion: service.dns.extensions.gardener.cloud/v1alpha1
        kind: DNSConfig
        providers:
          - domains:
              include:
                - osc.example.com
            secretName: shoot-dns-service-customer-dns-secret
            type: customer
Key fields:
spec.dns.providers[]: Registers the customer DNS provider with the shoot. Setprimary: falsesince the shoot already has a primary provider for its default domain.spec.dns.providers[].domains.include: List of DNS zones managed by the customer provider (must match zones created in DNS Management).spec.extensions[].type: shoot-dns-service: Configures the shoot-dns-service extension to use the customer provider for DNS record management on the shoot cluster.
Important
See DNS provider support policy for important information about supported provider types and primary provider recommendations.
End-to-end flow
- Create a DNS zone in the DNS tab (e.g.
osc.example.com) - Add DNS entries to the zone as needed (e.g.
www→1.2.3.4) - Link to a shoot cluster: Add an
osc-customerDNS provider via the dashboard or by editing the shoot YAML - The shoot-dns-service extension will use the zone to manage DNS records for the cluster's services and ingresses
Info
For managing DNS records using the Gardener shoot-dns-service extension with external DNS providers (e.g. OpenStack Designate, AWS Route53), refer to Managing DNS records by Gardener on shoot clusters.
DNS Provider Support Policy
Do not replace the primary DNS provider
Every shoot cluster is automatically provisioned with an OSC-internal primary DNS provider that manages the cluster's default domain. This provider is fully managed by OSC and does not create any dependencies on third-party services.
Do not configure a different provider as primary. Replacing the OSC-internal primary provider with an external one (e.g. AWS Route53, OpenStack Designate) introduces a dependency on a third-party service. If that external service becomes unavailable, it can cause a complete DNS outage for the shoot cluster, including the API server domain, potentially making the cluster unreachable.
Supported providers:
| Provider Type | Support Level | Usage |
|---|---|---|
| osc-customer | Fully supported | Use as a non-primary provider (primary: false) for managing custom DNS zones created in the DNS Management tab |
| AWS Route53, OpenStack Designate, and others | Best effort only | May be used as non-primary providers, but are not covered by OSC SLAs and may have limited troubleshooting support |
Danger
Always set primary: false when adding additional DNS providers to a shoot. The OSC-internal primary provider should remain the sole primary provider for your cluster.