Worker pool management
Note
If you want to use legacy Gardener Dashboard please refer to this documentation.
OSC Dashboard
-
Click
Settingsbutton as shown on picture below.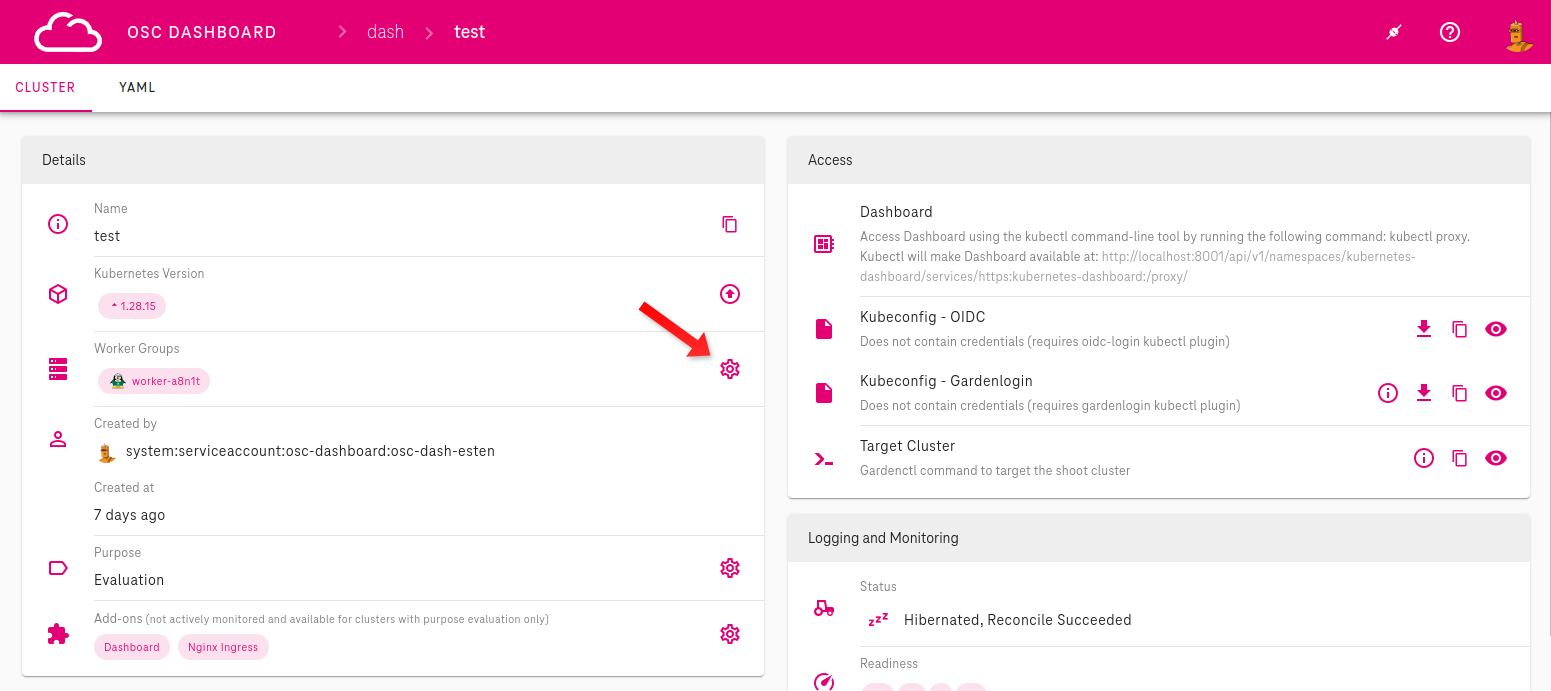 Continue in pop-up window as shown on image below
 -
Click
+sign to add worker group.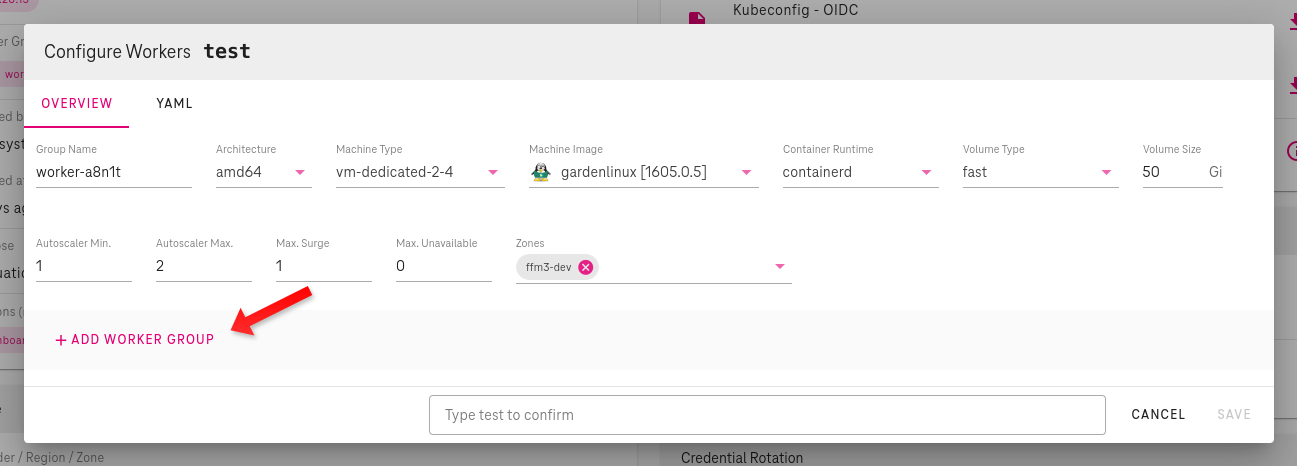
-
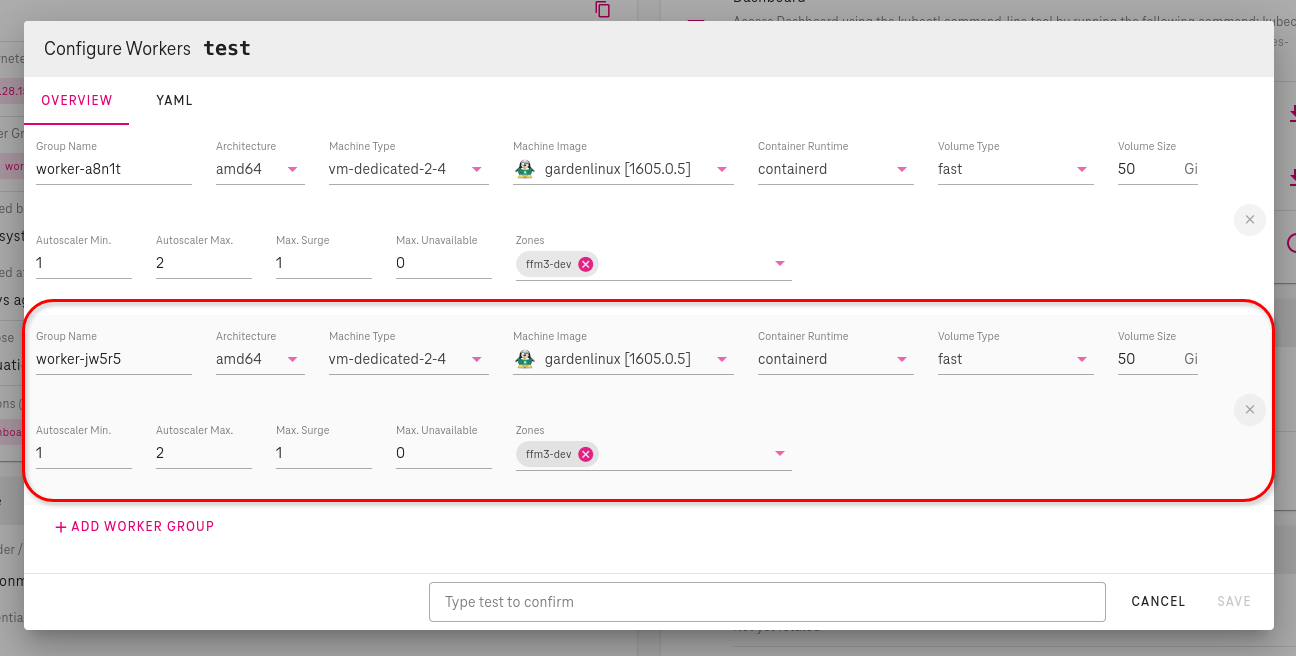
Configure your worker pool by setting these characteristics
Group Name: enter here name of new worker poolMachine Type: select from drop-down menu of currently supportedMachine Types, according to your needsMachine Image: select from drop-down menu of currently supportedMachine Images, according to your needsContainer Runtime: select from drop-down menu of currently supportedContainer Runtime, according to your needsVolume Size: enter here volume size in GiB- Autoscaling configuration:
Autoscaling Min.: enter here minimum number of worker nodesAutoscaling Max.: enter here maximum number of worker nodesMax. Surge: enter here maximum number of nodes that can be created exceeding the maximum size during updatesMax. Unavailable: enter here maximum number of nodes that can be unavailable during update
Zone: select Availability Zones
Garden Cluster
On the Garden cluster level the Shoot object can be edited
(using kubectl edit or kubectl patch)
to update worker pool configuration.
Example worker group setup:
apiVersion: core.gardener.cloud/v1beta1
kind: Shoot
spec:
  provider:
    type: onmetal
    # Please note that workers is a list of worker pool configurations.
    workers:
    - name: idp
      cri:
        name: containerd
      machine:
        architecture: amd64
        image:
          name: gardenlinux
          version: 1061.0.20
        type: <machine-class>
      maxSurge: 1
      maxUnavailable: 0
      maximum: 12
      minimum: 12
      systemComponents:
        allow: true
      volume:
        size: 100Gi
        type: fast
      zones:
      - mdb1-pool1
      - mdb2-pool1
      - mdb3-pool1
    # Here an another worker pool configuration can be added
Shoot Worker Nodes Settings
SSHAccess ensures that the sshd.service is running on the worker nodes. This is handled by a systemd service called sshd-ensurer.service, which runs every 15 seconds on each worker node. When set to true, the service ensures that sshd.service is unmasked, enabled, and running. When set to false, it ensures that sshd.service is disabled, masked, and stopped. This also terminates all active SSH connections on the host.
sshAccess.enabled is set to true by default.
Example Usage in a Shoot
spec:
  provider:
    workersSettings:
      sshAccess:
        enabled: false
For more details, refer to the upstream Gardener documentation: Shoot Worker Nodes Settings
Determining Available IP Addresses in a Shoot Cluster
It is essential to understand how to calculate available IP addresses within a shoot cluster.
Note
The calculation of available IP addresses within a shoot cluster is crucial for deploying new nodes or services without conflicts.
Calculating Free Available IP Addresses
The maximum possible number of IP addresses are determined by the
Shoot cluster's Node CIDR IP range.
This is defined in th Shoot manifest in .spec.networking.nodes,
(e.g. 10.0.0.0/28).
The important part is the number after the slash — the suffix.
This determines the number of node network addresses for the range.
| CIDR Suffix | Number of nodes |
|---|---|
| /23 | 512 |
| /24 | 256 |
| /25 | 128 |
| /26 | 64 |
| /27 | 32 |
| /28 | 16 |
| /29 | 8 |
| /30 | 4 |
Info
The maximum size of a Shoot Node range is /23, that is 512 Nodes.
All Shoot worker nodes reserve one address from this pool
(can be checked with kubectl get nodes).
Also, every existing private Load Balancer reserves one address.
Private Load Balancers have the annotation
.metadata.annotations.service.beta.kubernetes.io/onmetal-load-balancer-internal=true.
The following command prints out all Load Balancers, with this annotation.
kubectl get services \
  -A \
  -o custom-columns='NAMESPACE:.metadata.namespace,NAME:.metadata.name,IS PRIVATE:.metadata.annotations.service\.beta\.kubernetes\.io/onmetal-load-balancer-internal'
Here's breakdown of the command:
-
kubectl get services: is the base command to retrieve information about Services in your Kubernetes cluster. -
-A: This flag stands for "all namespaces". It tells kubectl to retrieve information about Services in all namespaces accross your cluster. -
-o custom-columns: Output format is custom columns. -
'NAMESPACE:.metadata.namespace': Display namespace under column "NAMESPACE". -
,NAME:.metadata.name:Display name under column "NAME". -
IS PRIVATE:.metadata.annotations.service\.beta\.kubernetes\.io/onmetal-load-balancer-internalCheck if internal LB flag is set (true or false). Count lines with true in last column.
Example Calculation
Let's assume we have a shoot cluster with /28 on .spec.networking.nodes.
That means our maximum possible number of IP addresses is 16 inside of shoot network. Then
let's check how many private Load Balancers are in use, we have 2. Let's assume there are currently 10 worker nodes running in the shoot. Let's calculate:
16 - ( 10 + 2 )
16 - 12
4
We have 4 IP addresses free and with that we can either create 4 private Load Balancers or upscale the shoot cluster by 4 nodes.