User Management in Keycloak
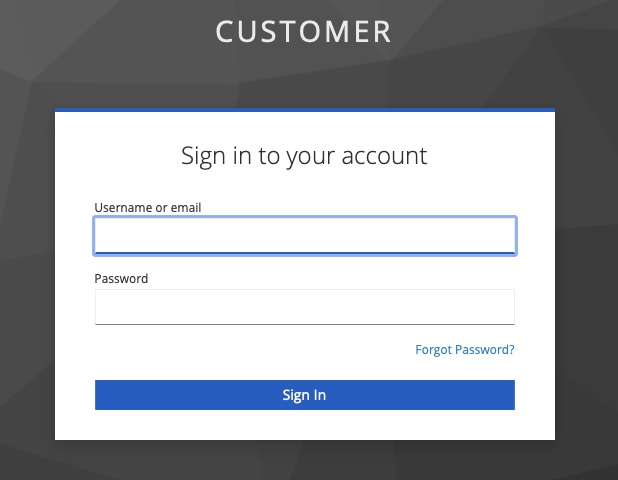
Log in to Keycloak
Login to Keycloak
To manage users navigate to Users in left-side menu (marked by 1).
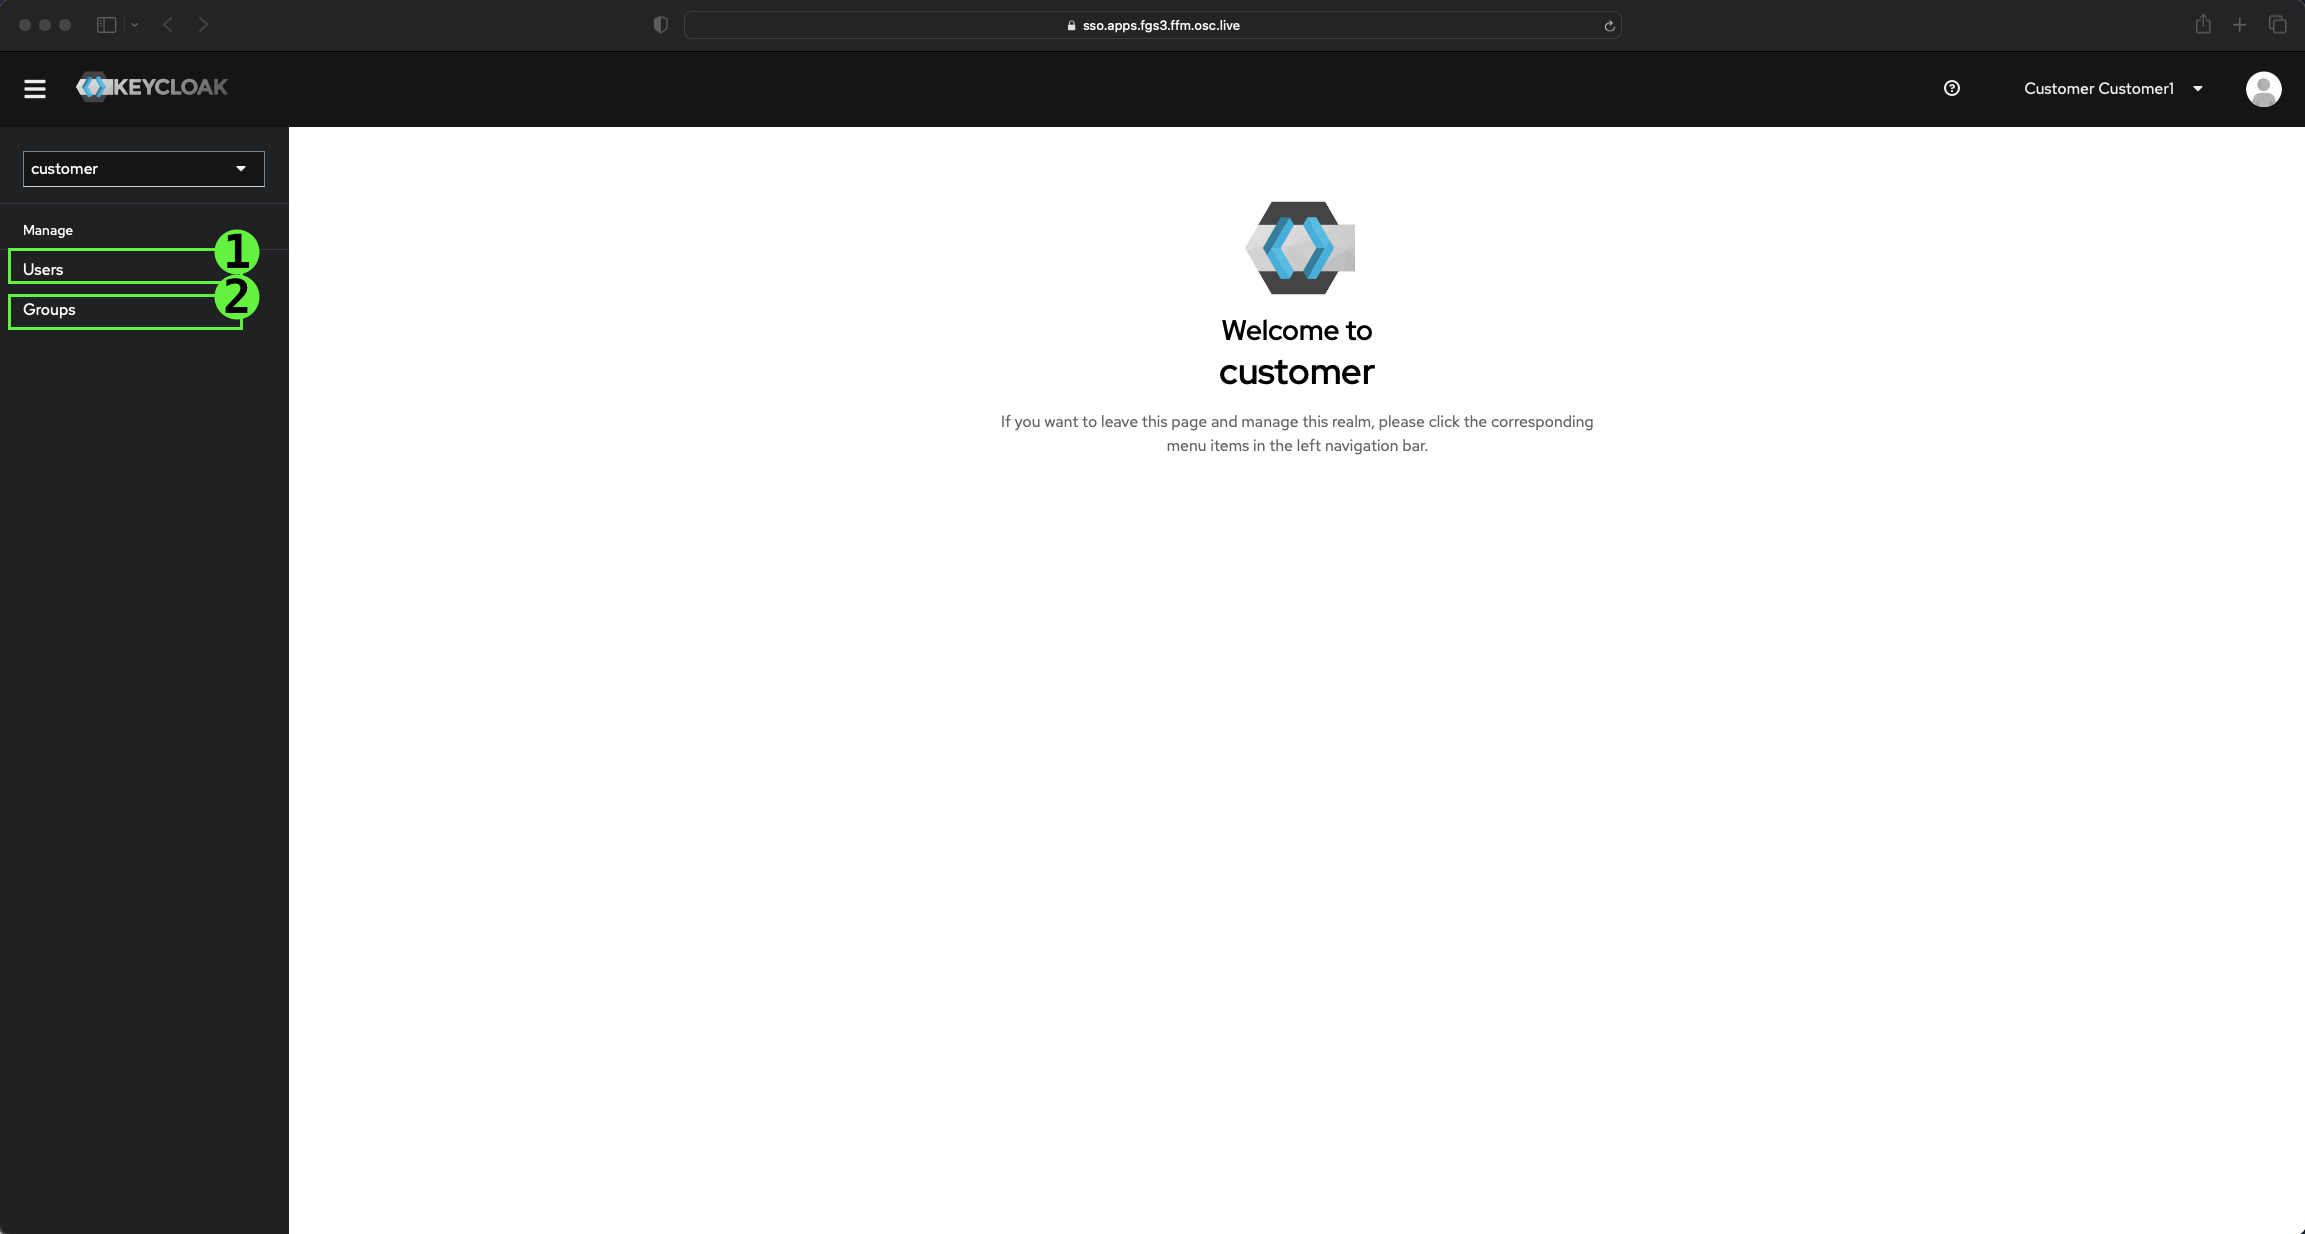
Manage users
-
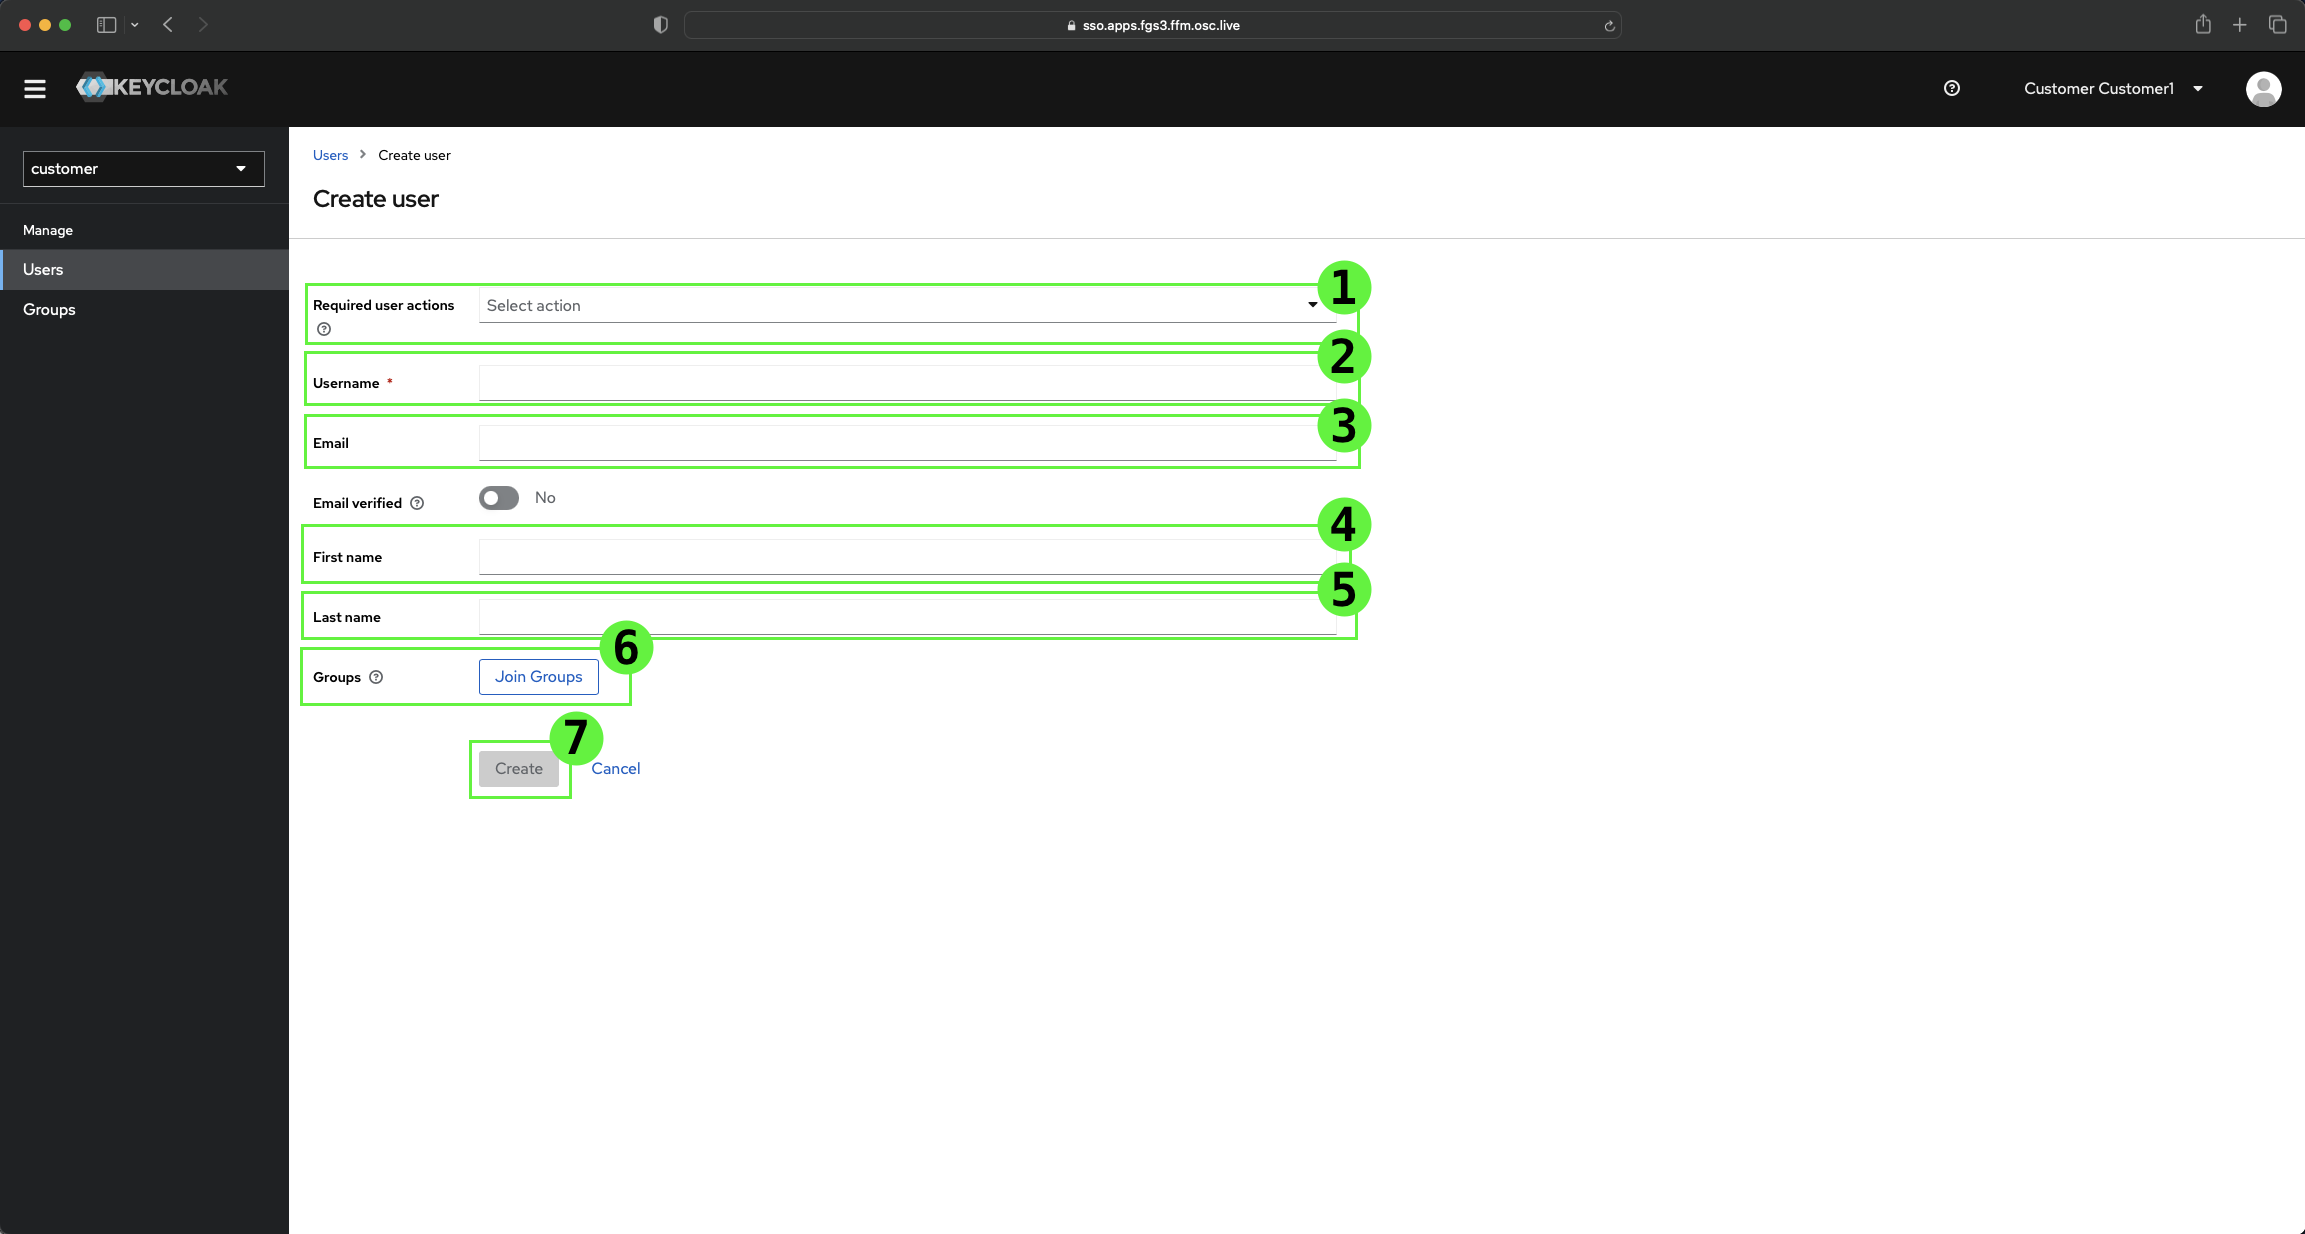
Click Add user to create a new user.
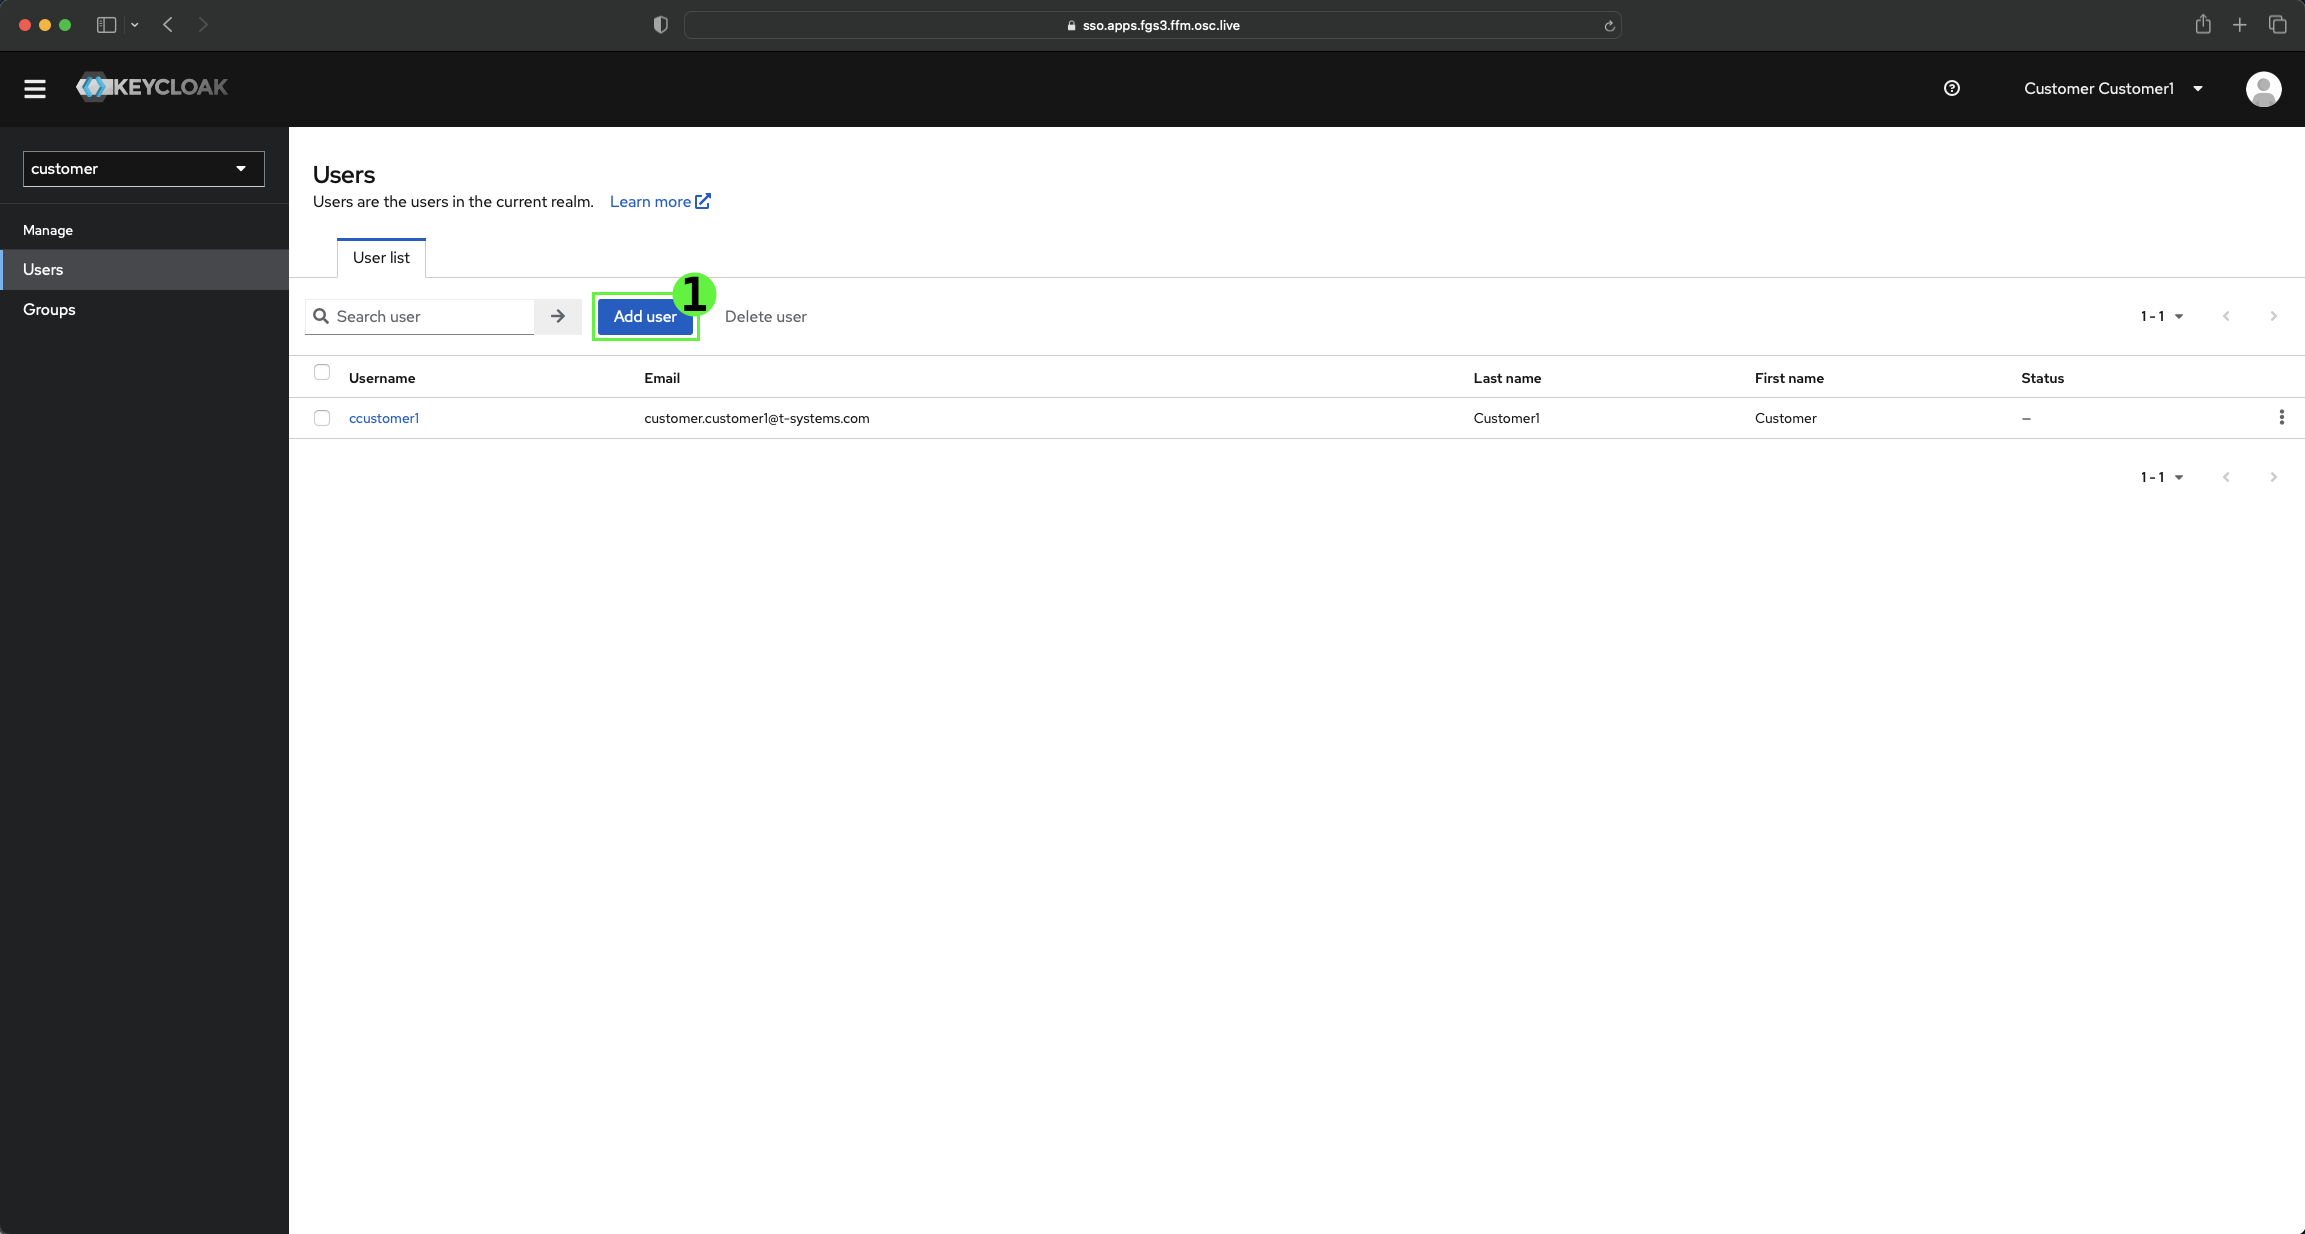 Mandatory fields are marked by an asterisk (*).
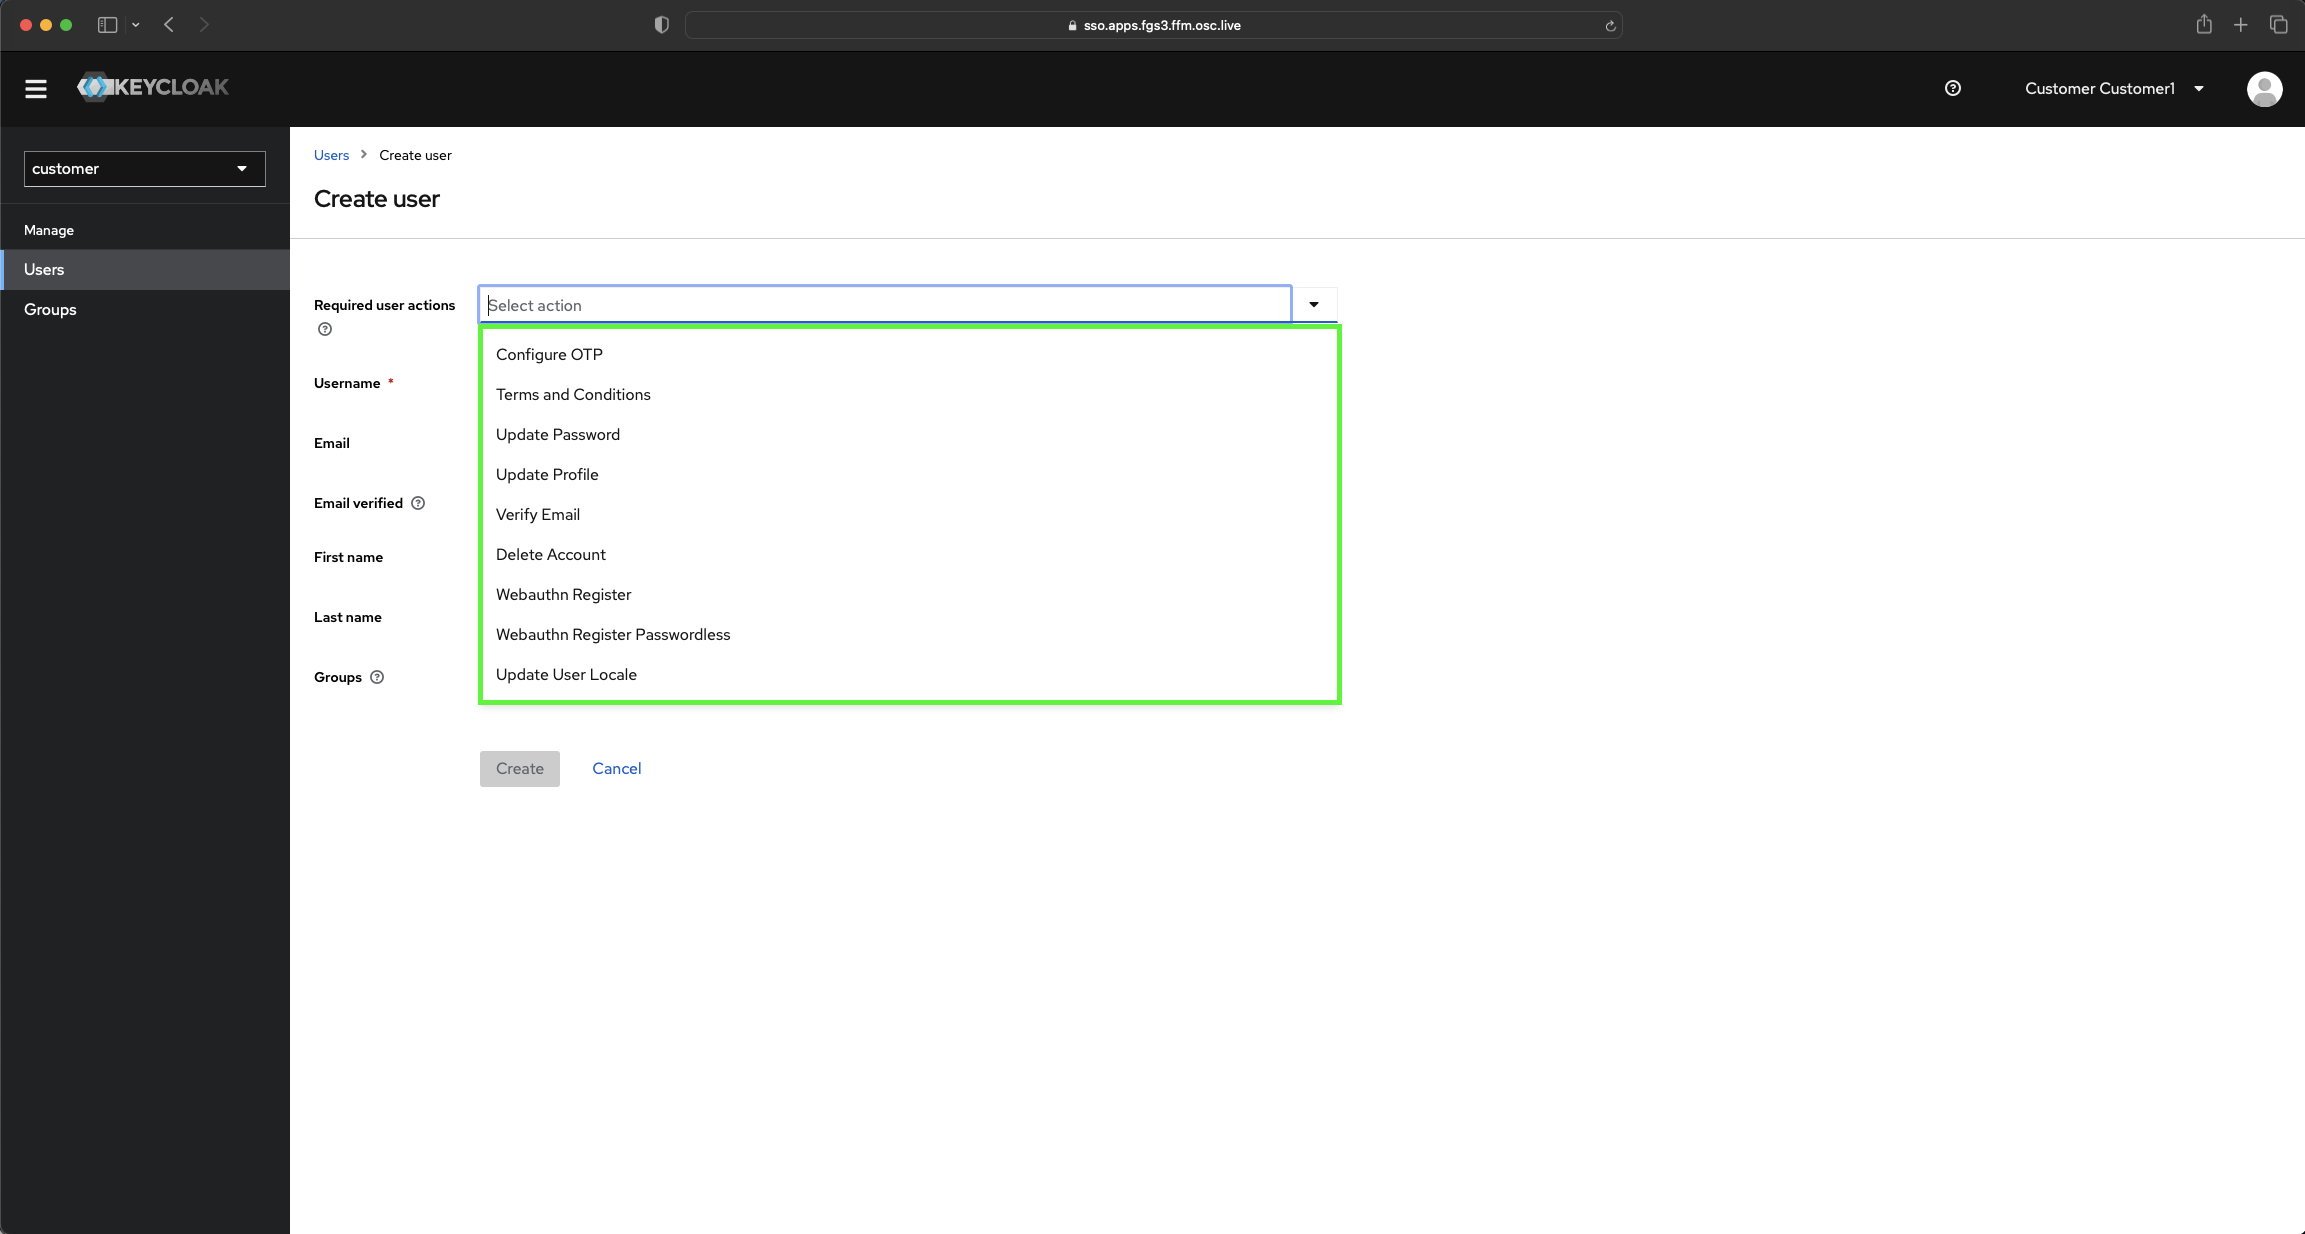
Optionally select additional actions to be performed.
These can be selected also after creating the user.
Mandatory fields are marked by an asterisk (*).
Optionally select additional actions to be performed.
These can be selected also after creating the user.
-
Enter the user's information:
- the Username.
- the Email in the format
*.@domain. In case of an invalid value, a notification will be displayed. - the First name.
- the Last Name.
-
By pressing button Join Groups you can assign the user to groups. This can be done also after user creation.
-
By clicking the button Create the user gets created.
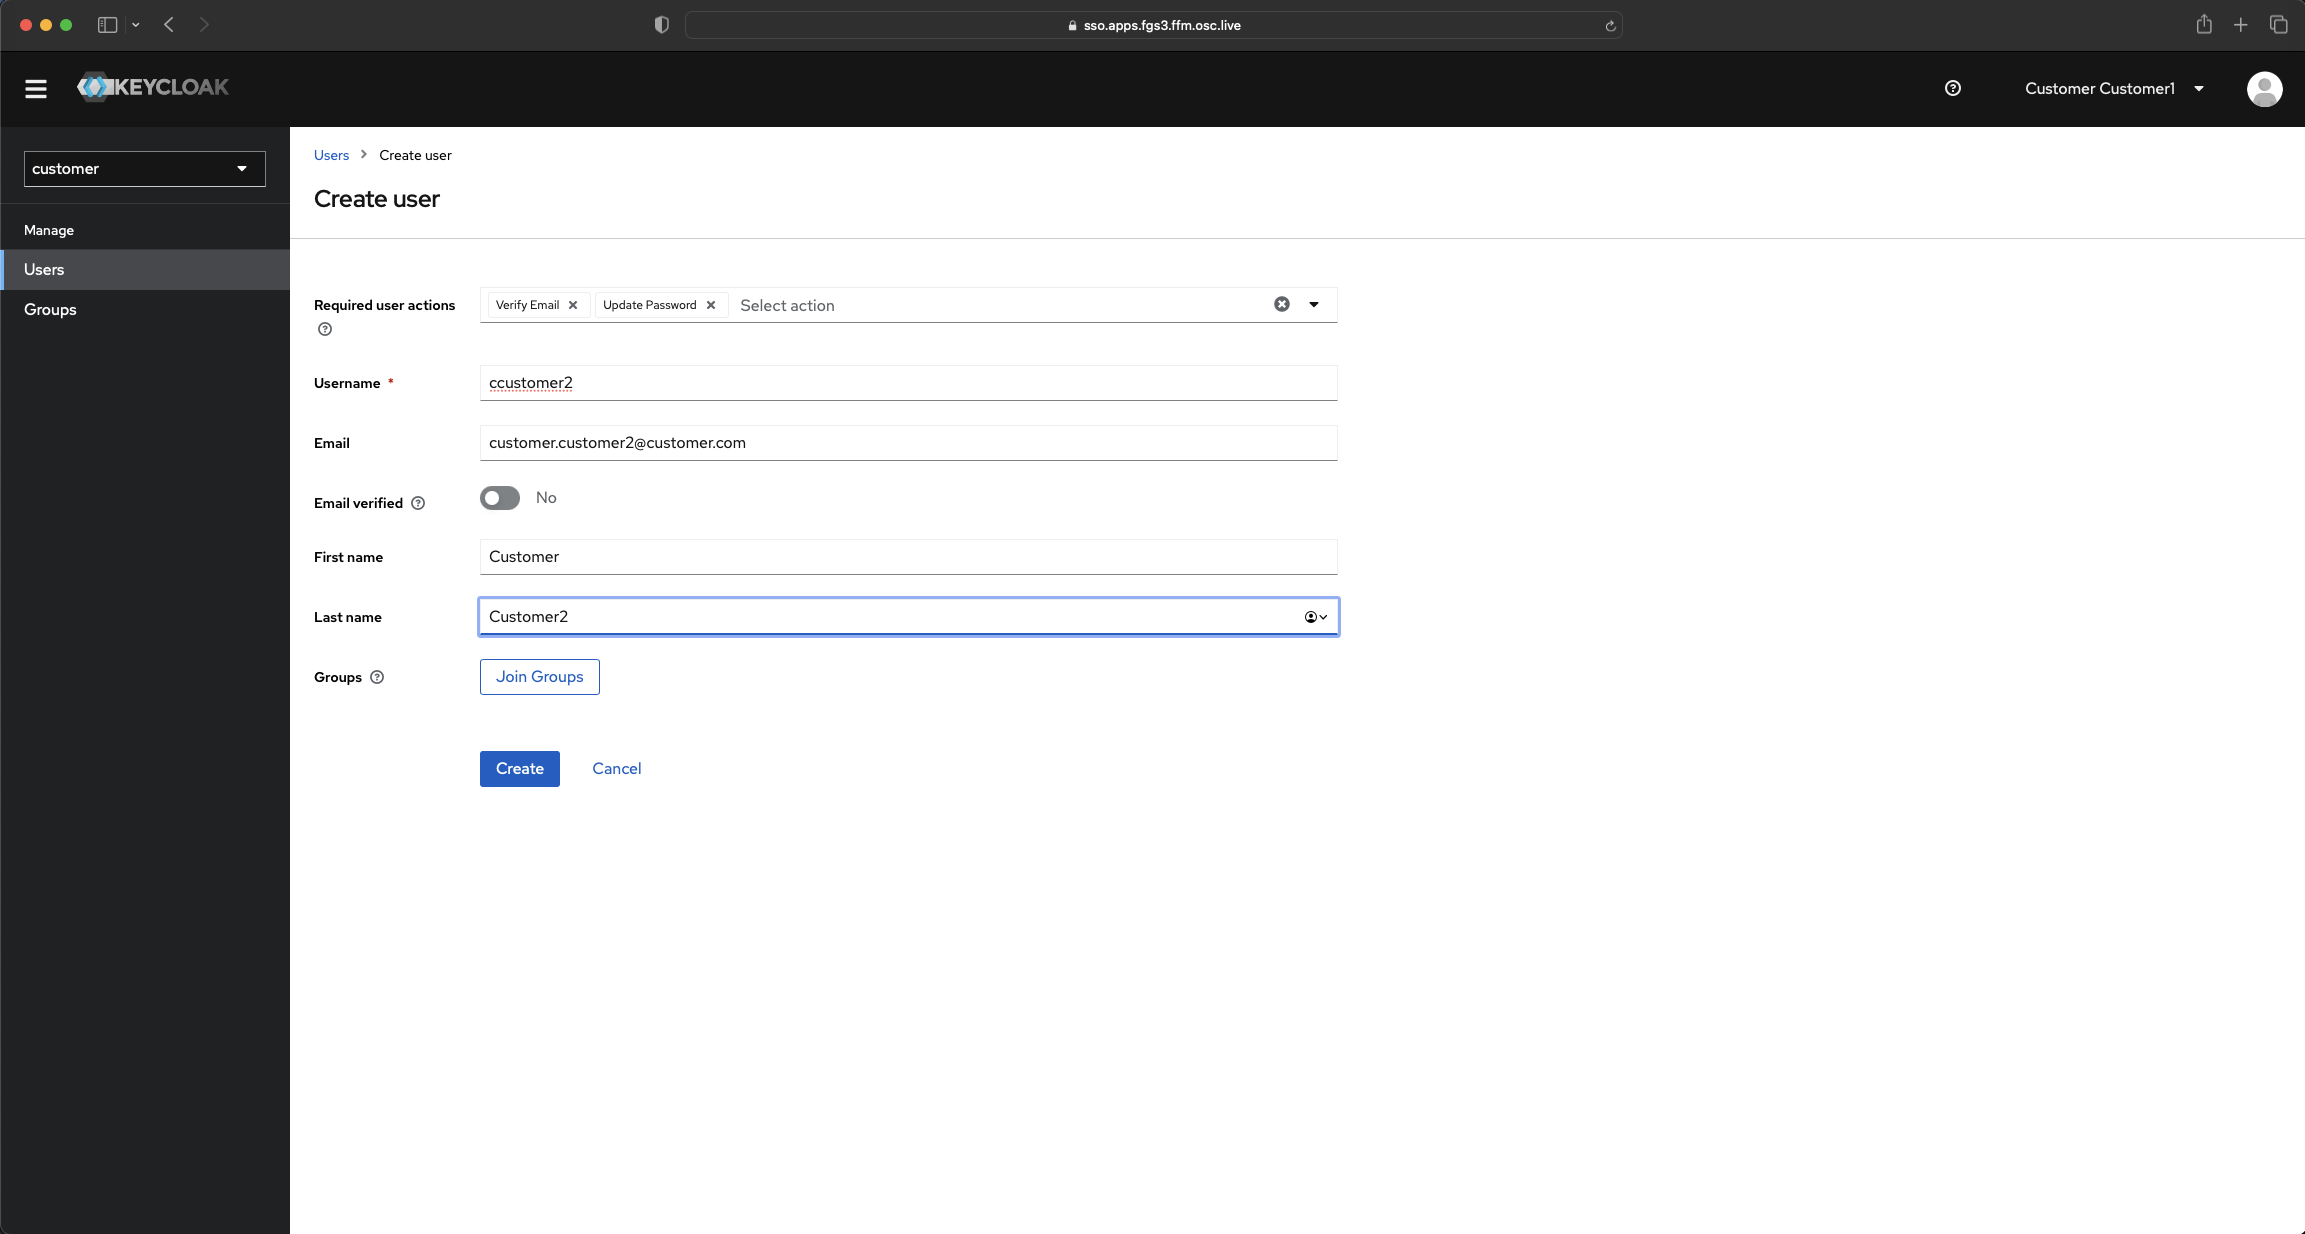
 Please see the example below:
-
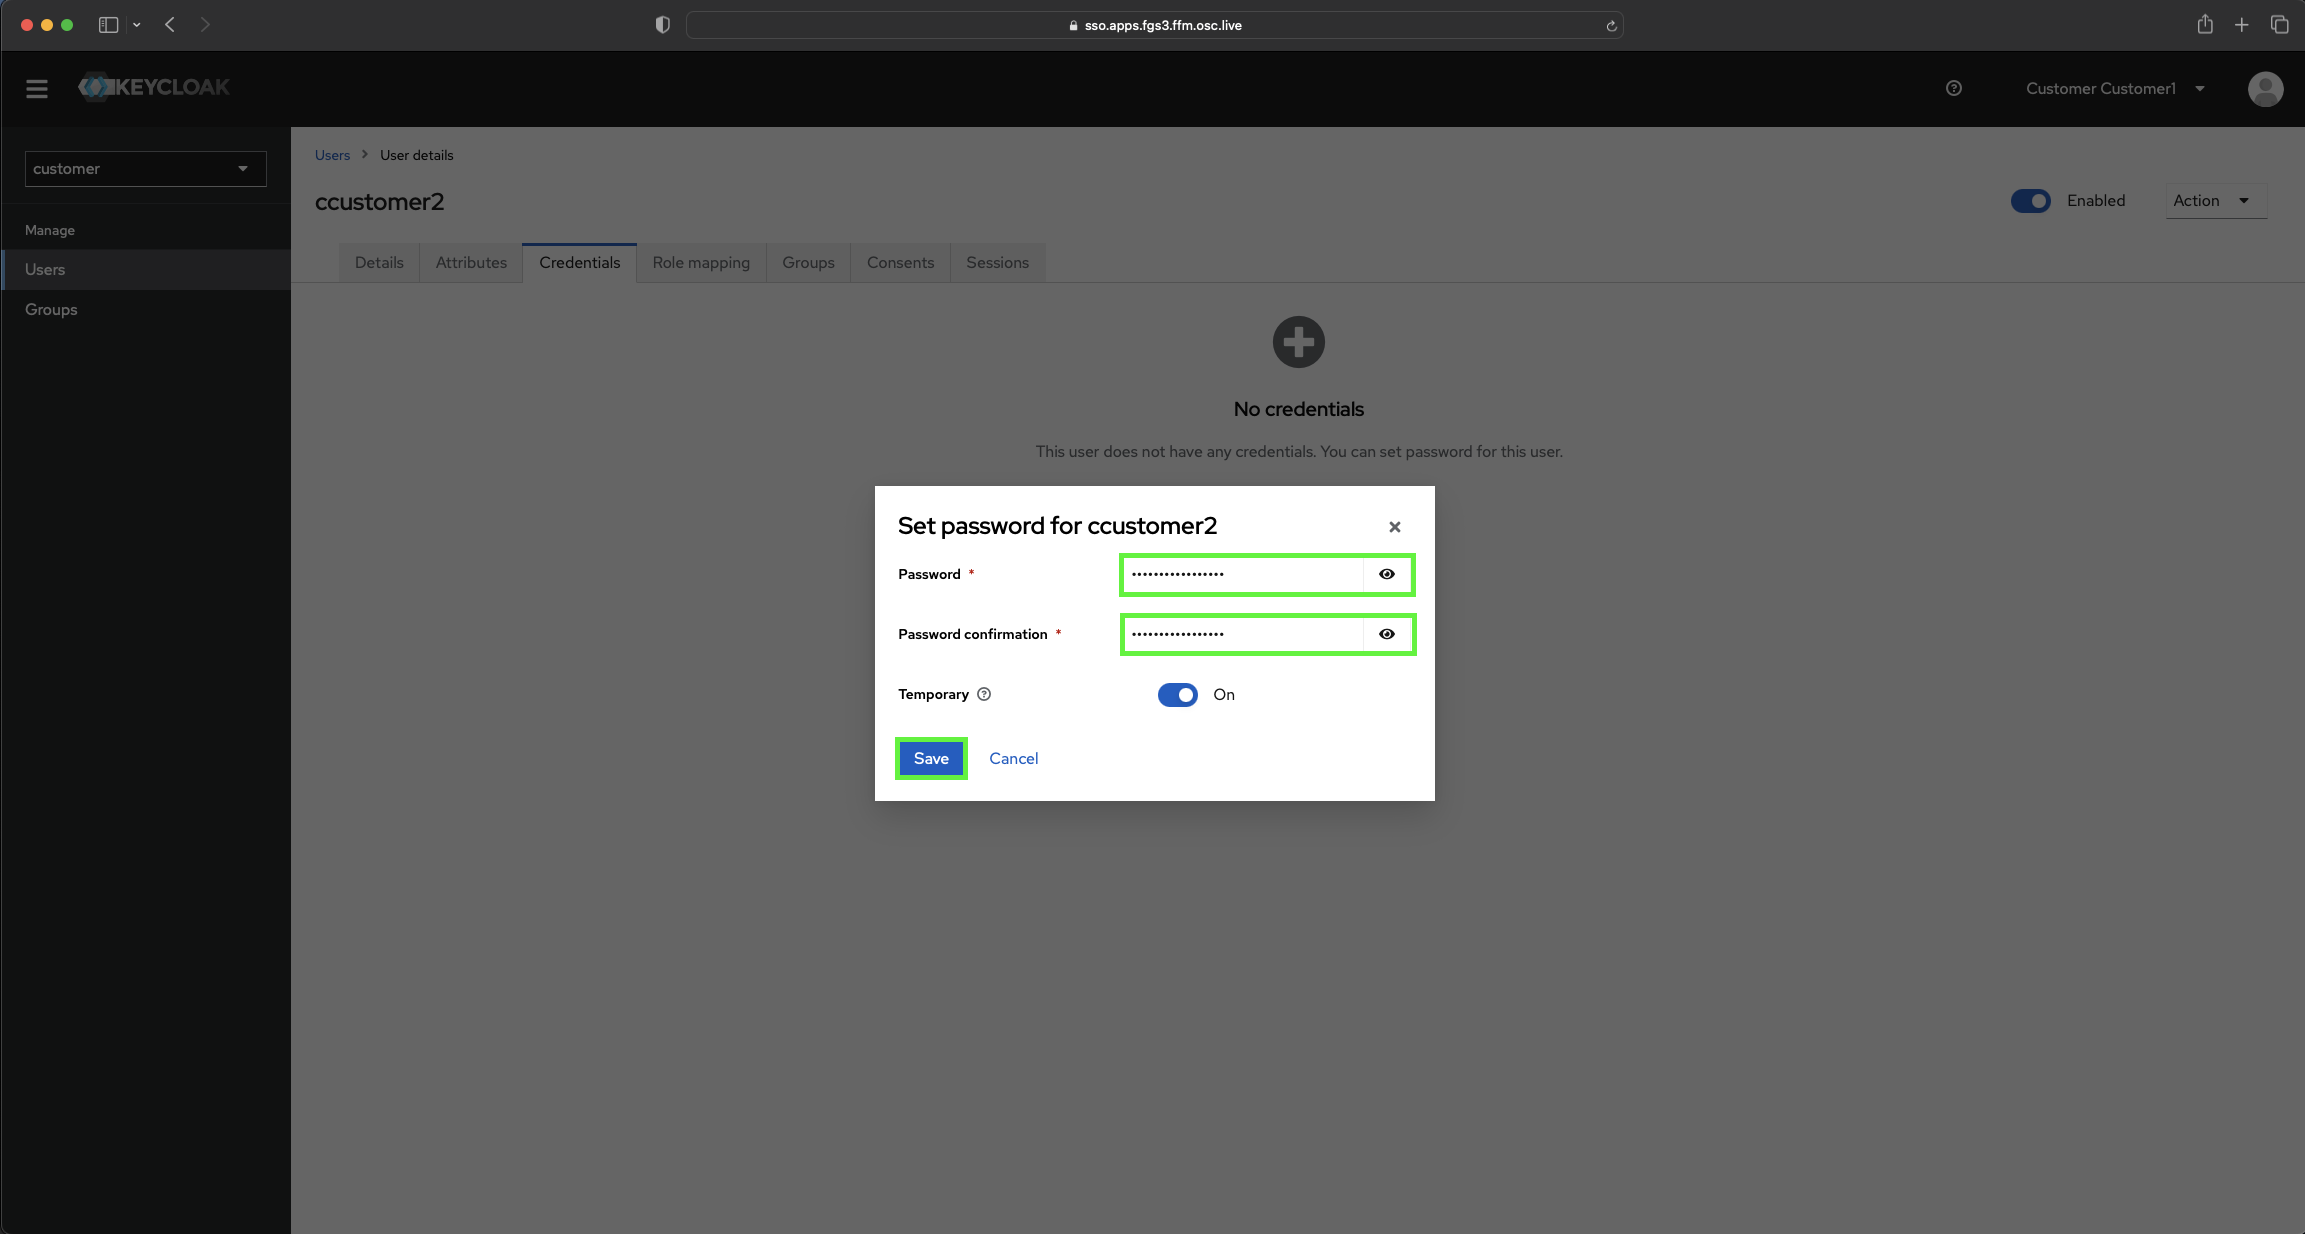
The user is created without a password. To set password, user needs to use
Forgot password, that will generate first password. Additional Required actions have to be set, during the user creation process. Please refer to point 6 in this section. There is also possibility to create an initial password for new user, but we strongly do not recommend this. If you navigate to Credentials tab and click Set Password. It is recommended to create temporary passwords during user creation by selecting the Temporary option — users will be required to change their passwords on first login. Enter the (temporary) password two times. It is recommended to create strong passwords based on the customer password policy.Please see examples below:

-
During the user creation process (following the point 1 in this section), we strongly recommend to increase the user account security by setting additional Required user actions.
Verify Email- sends an email to the user to verify their email address.Update Password- requires user to enter a new password.-
Configure OTP- requires setup of a One Time Password (OTP), used as a 2 Factor-Authentication (2FA) authentication security mechanism.
Within this configuration, during the first login, user will be asked for email verification, password update or configure OTP authentication.
Manage OTP configuration
If the Configure OTP user action is enabled,
the user will be prompted to configure a One-Time Password on the next login to the Gardener Dashboard.
A QR code will be displayed (or, alternatively the secret Key if QR scanning is not possible for the user).
The OTP is based on the well-known TOTP scheme used by the various authenticator applications available on mobile phones. The user is free to choose any preferred app.
If the user needs to change or reset existing OTP configuration, then it is needed to delete the previous OTP configuration from user profile as follows:
- Navigate in the realm to the
Usersection (panel on the left side) - From the user list, choose the one for which you need to reset OTP
-
Navigate to the
Credentialssection and delete existing OTP configuration history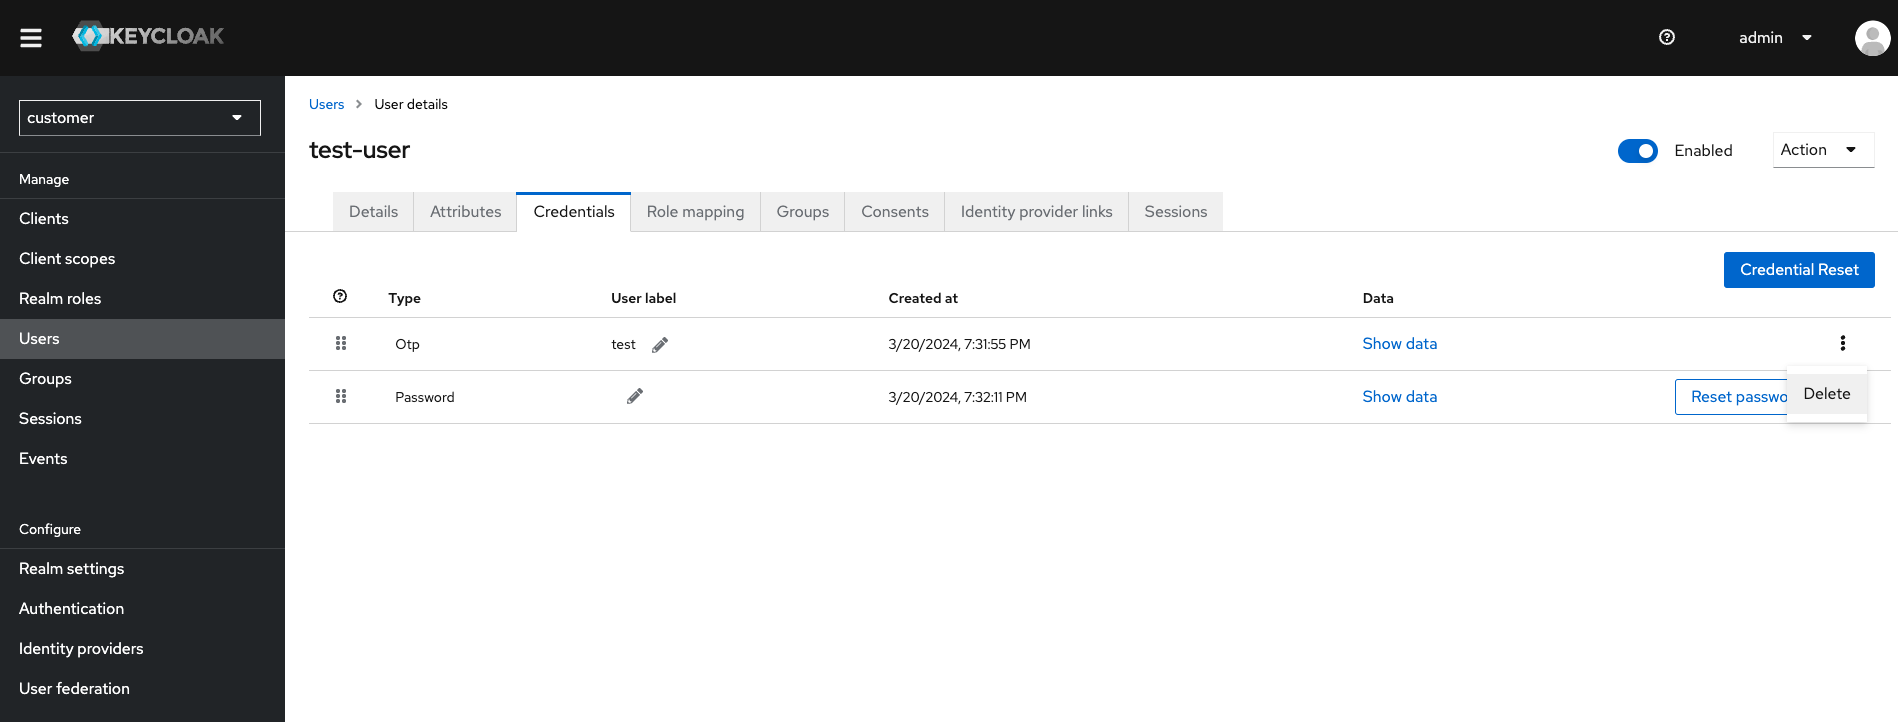
- In
Detailssection, verify that all Required user actions (see above) are set up - On the next login to the Gardener Dashboard the user is prompted for OTP configurations again
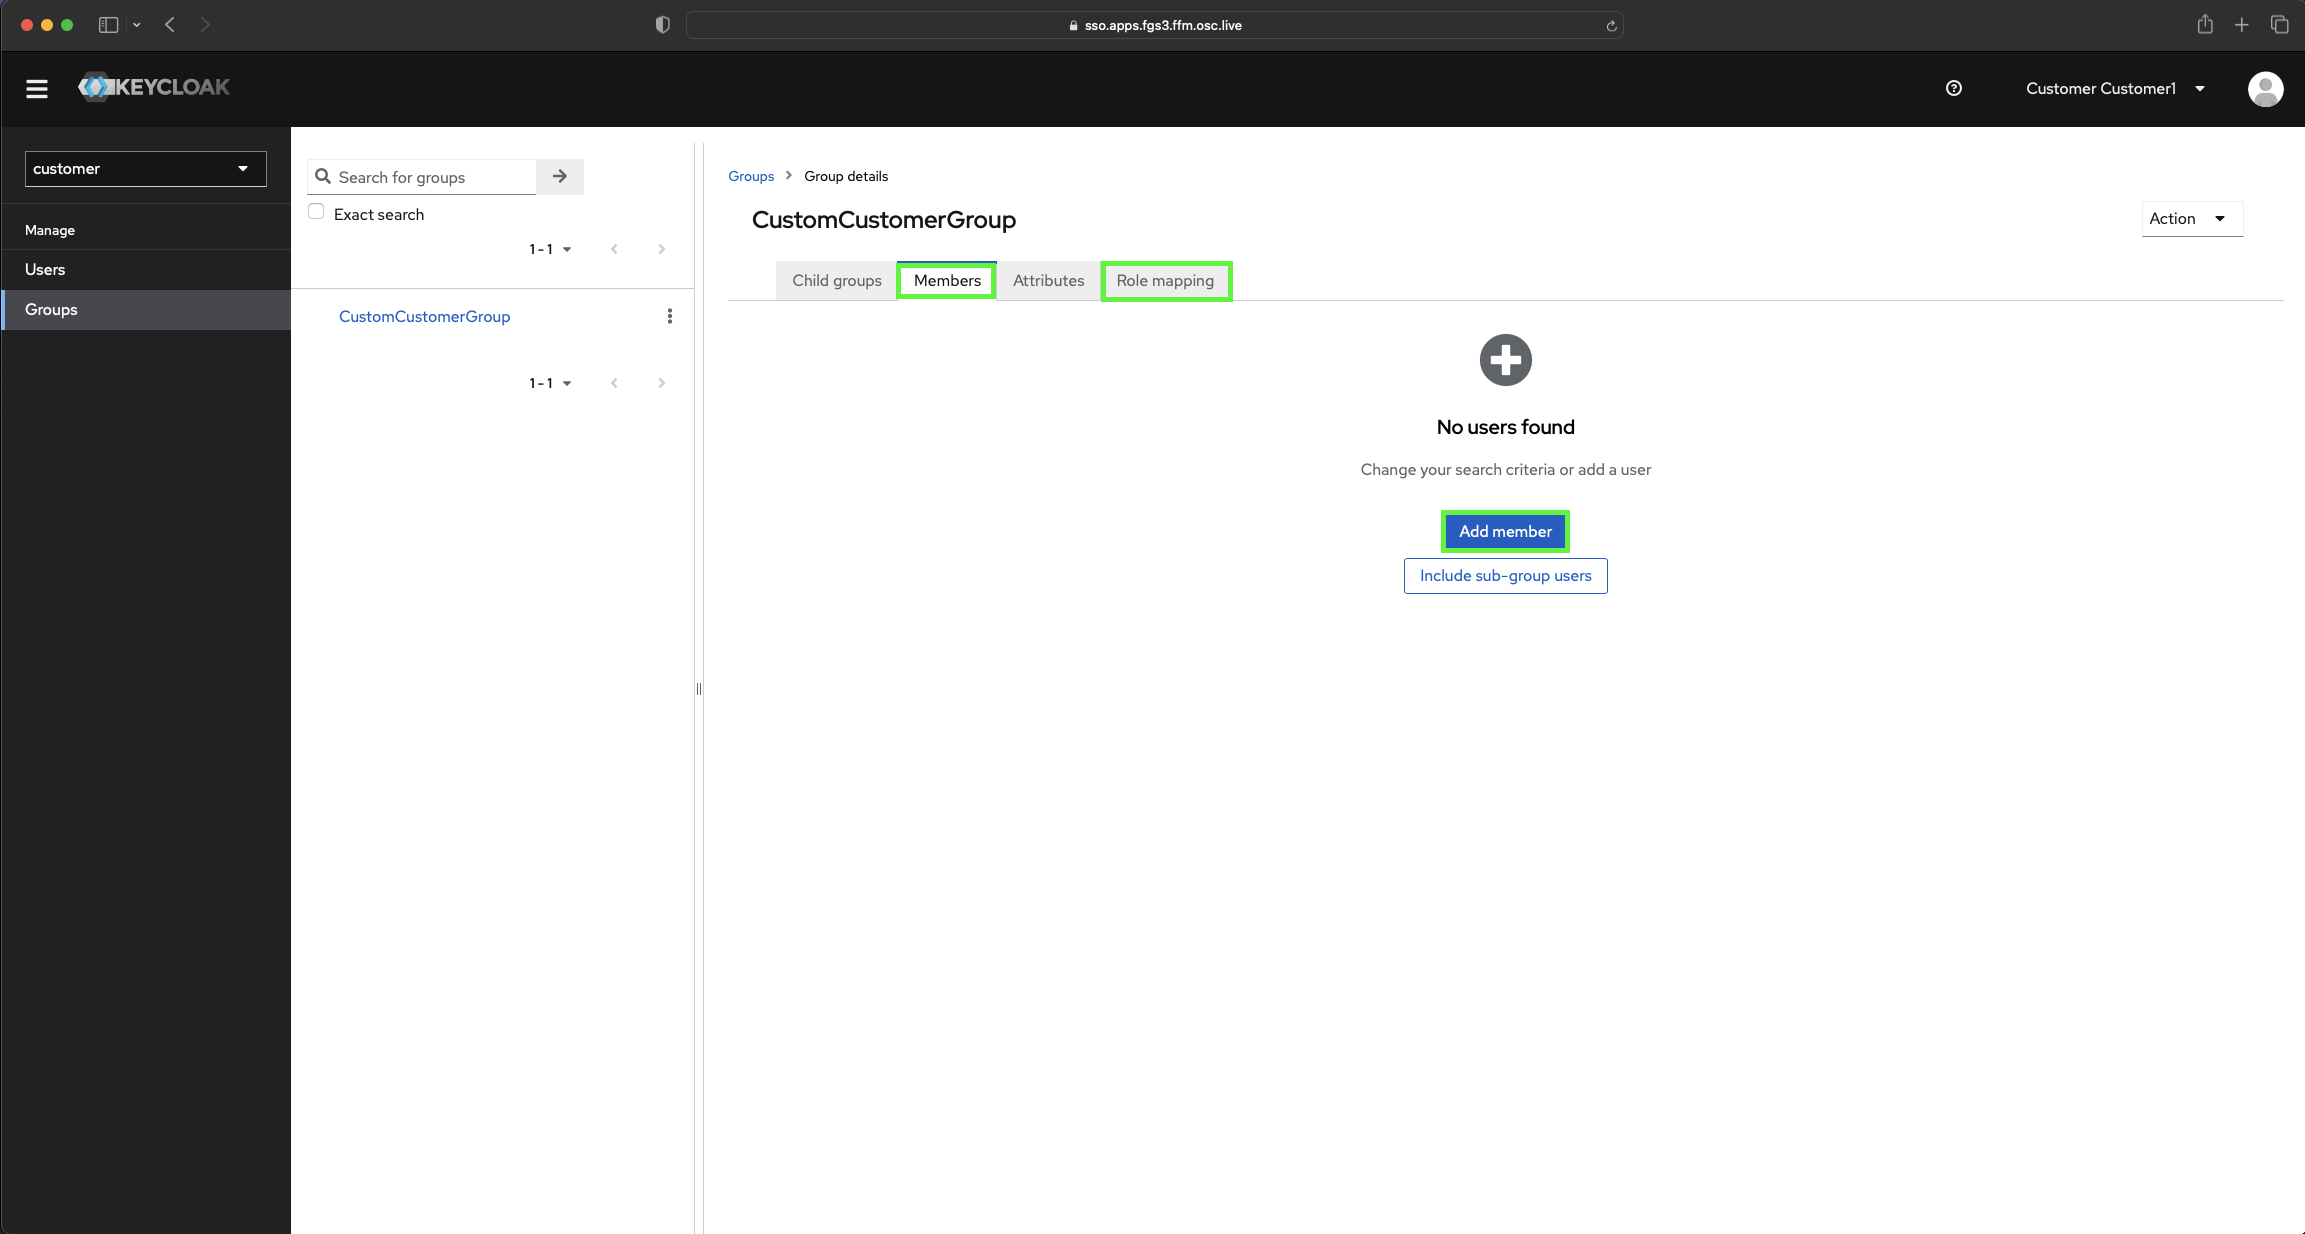
Manage group memberships
To manage groups, navigate in left-side menu to Groups marked by 2.
-
Select the Group to modify.
-
Select the Members tab and press the Add member button.
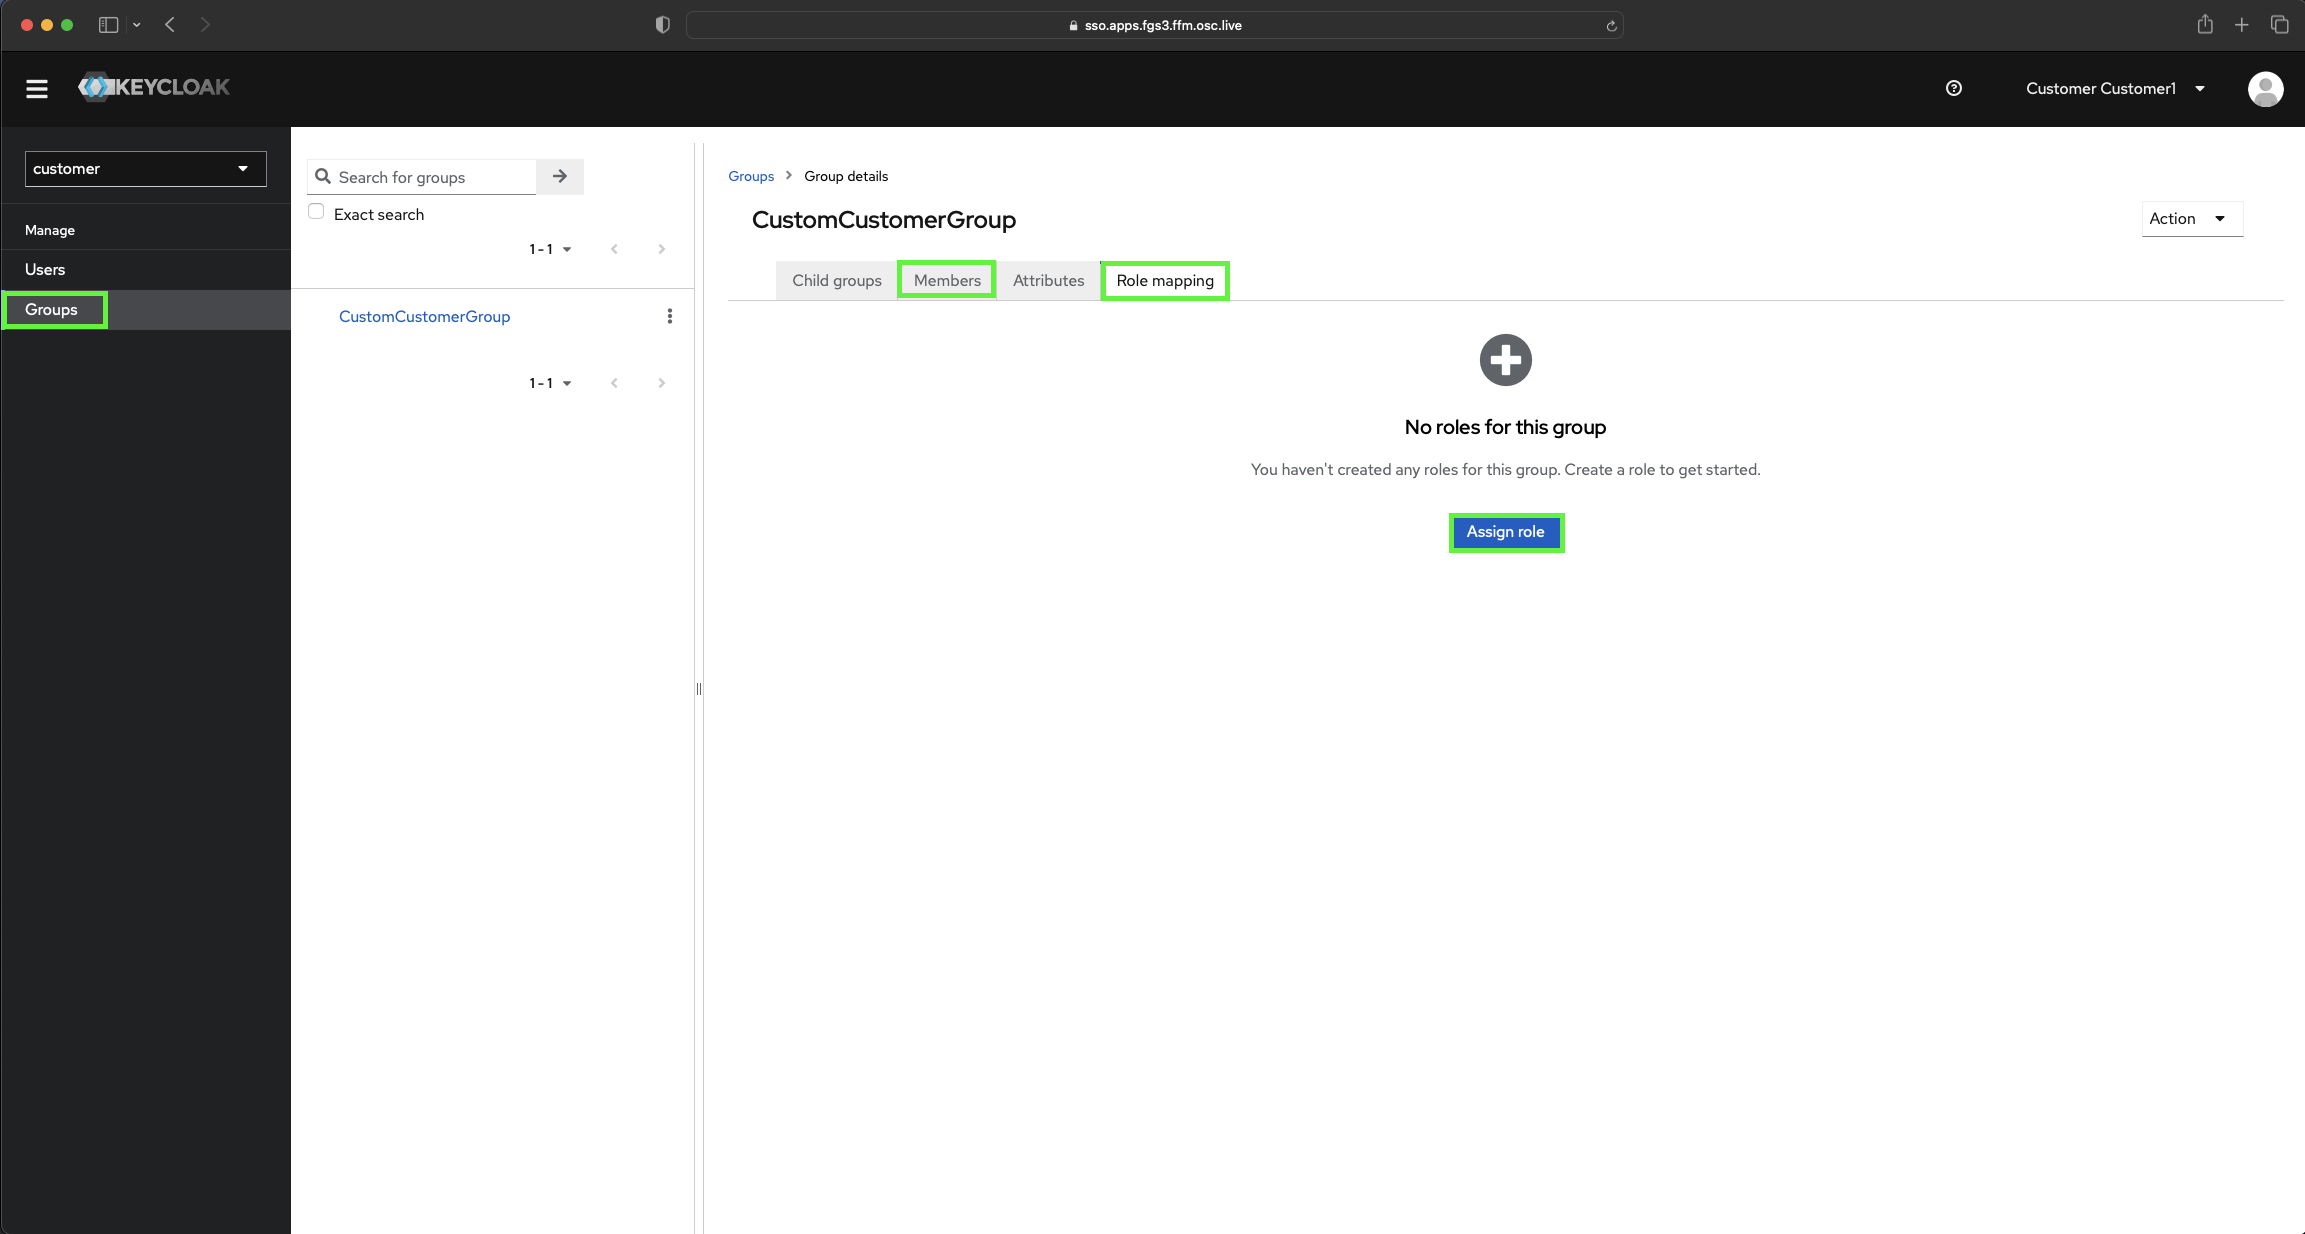
Manage group role mappings
To manage roles mapped to groups, navigate in left-side menu to Groups marked by 2.
-
Select the Group to modify.
-
Select the Role Mapping tab and press the Add role button.