Create & Delete via OSC Dashboard
Accessing Garden Cluster
To gain access to the Garden cluster, please refer to the documentation in Identity and Access Management.
Important notes before deployment
For comprehensive details on the various configuration options and their specific uses, please refer to the Gardener Shoot Spec Configuration Documentation. This resource provides the guidance necessary to understand and apply the correct settings for your Shoot cluster.
Please note that the Shoot manifest can be quite complex, with various settings and extensions that can be specified. Ensure that your manifest aligns with your requirements and the specific needs of your cluster.
Important Shoot CIDR considerations
For more information regarding the Shoot's network setup, please consult the Shoot CIDR information page.
An incorrect CIDR block definition will prevent the correct deployment or function of the Shoot cluster.
Infrastructure secret
To able to deploy Shoot cluster you need to configure an Infrastructure Secret. Please refer to the documentation which describes the process. The secret value will be provided by OSC.
Project and Shoot name length limitation with an Ingress controller
If you plan to use an Ingress controller — the OSC provided one or your own — you need to take into account the length limit for the Project and Shoot names.
Shoot number limit
To prevent overloading of the Seed clusters, a limit on the number of creatable Shoot clusters were defined during the initial onboarding process.
Shoot creation will be refused if this limit is reached. Please contact OSC support in this case.
Deploying a Shoot cluster
There are two methods for deploying a Shoot cluster:
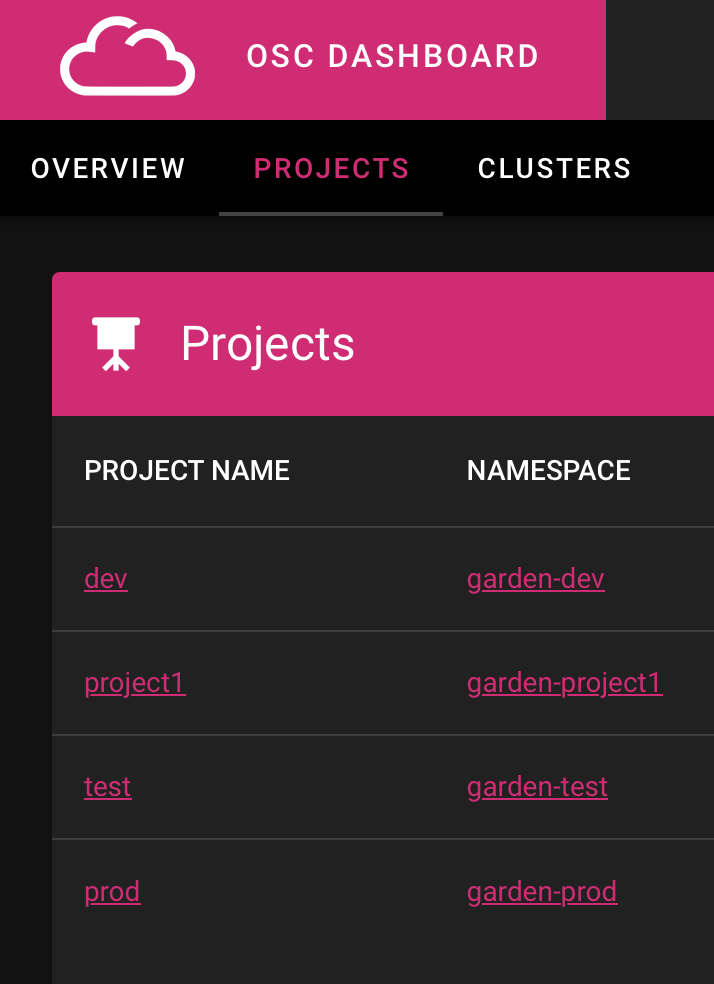
Deploying using the OSC dashboard
-
Connect to the OSC dashboard (a link and initial password will be provided). For information on how to log in, please refer to Authentication Guidelines.
-
Select a Project.
-
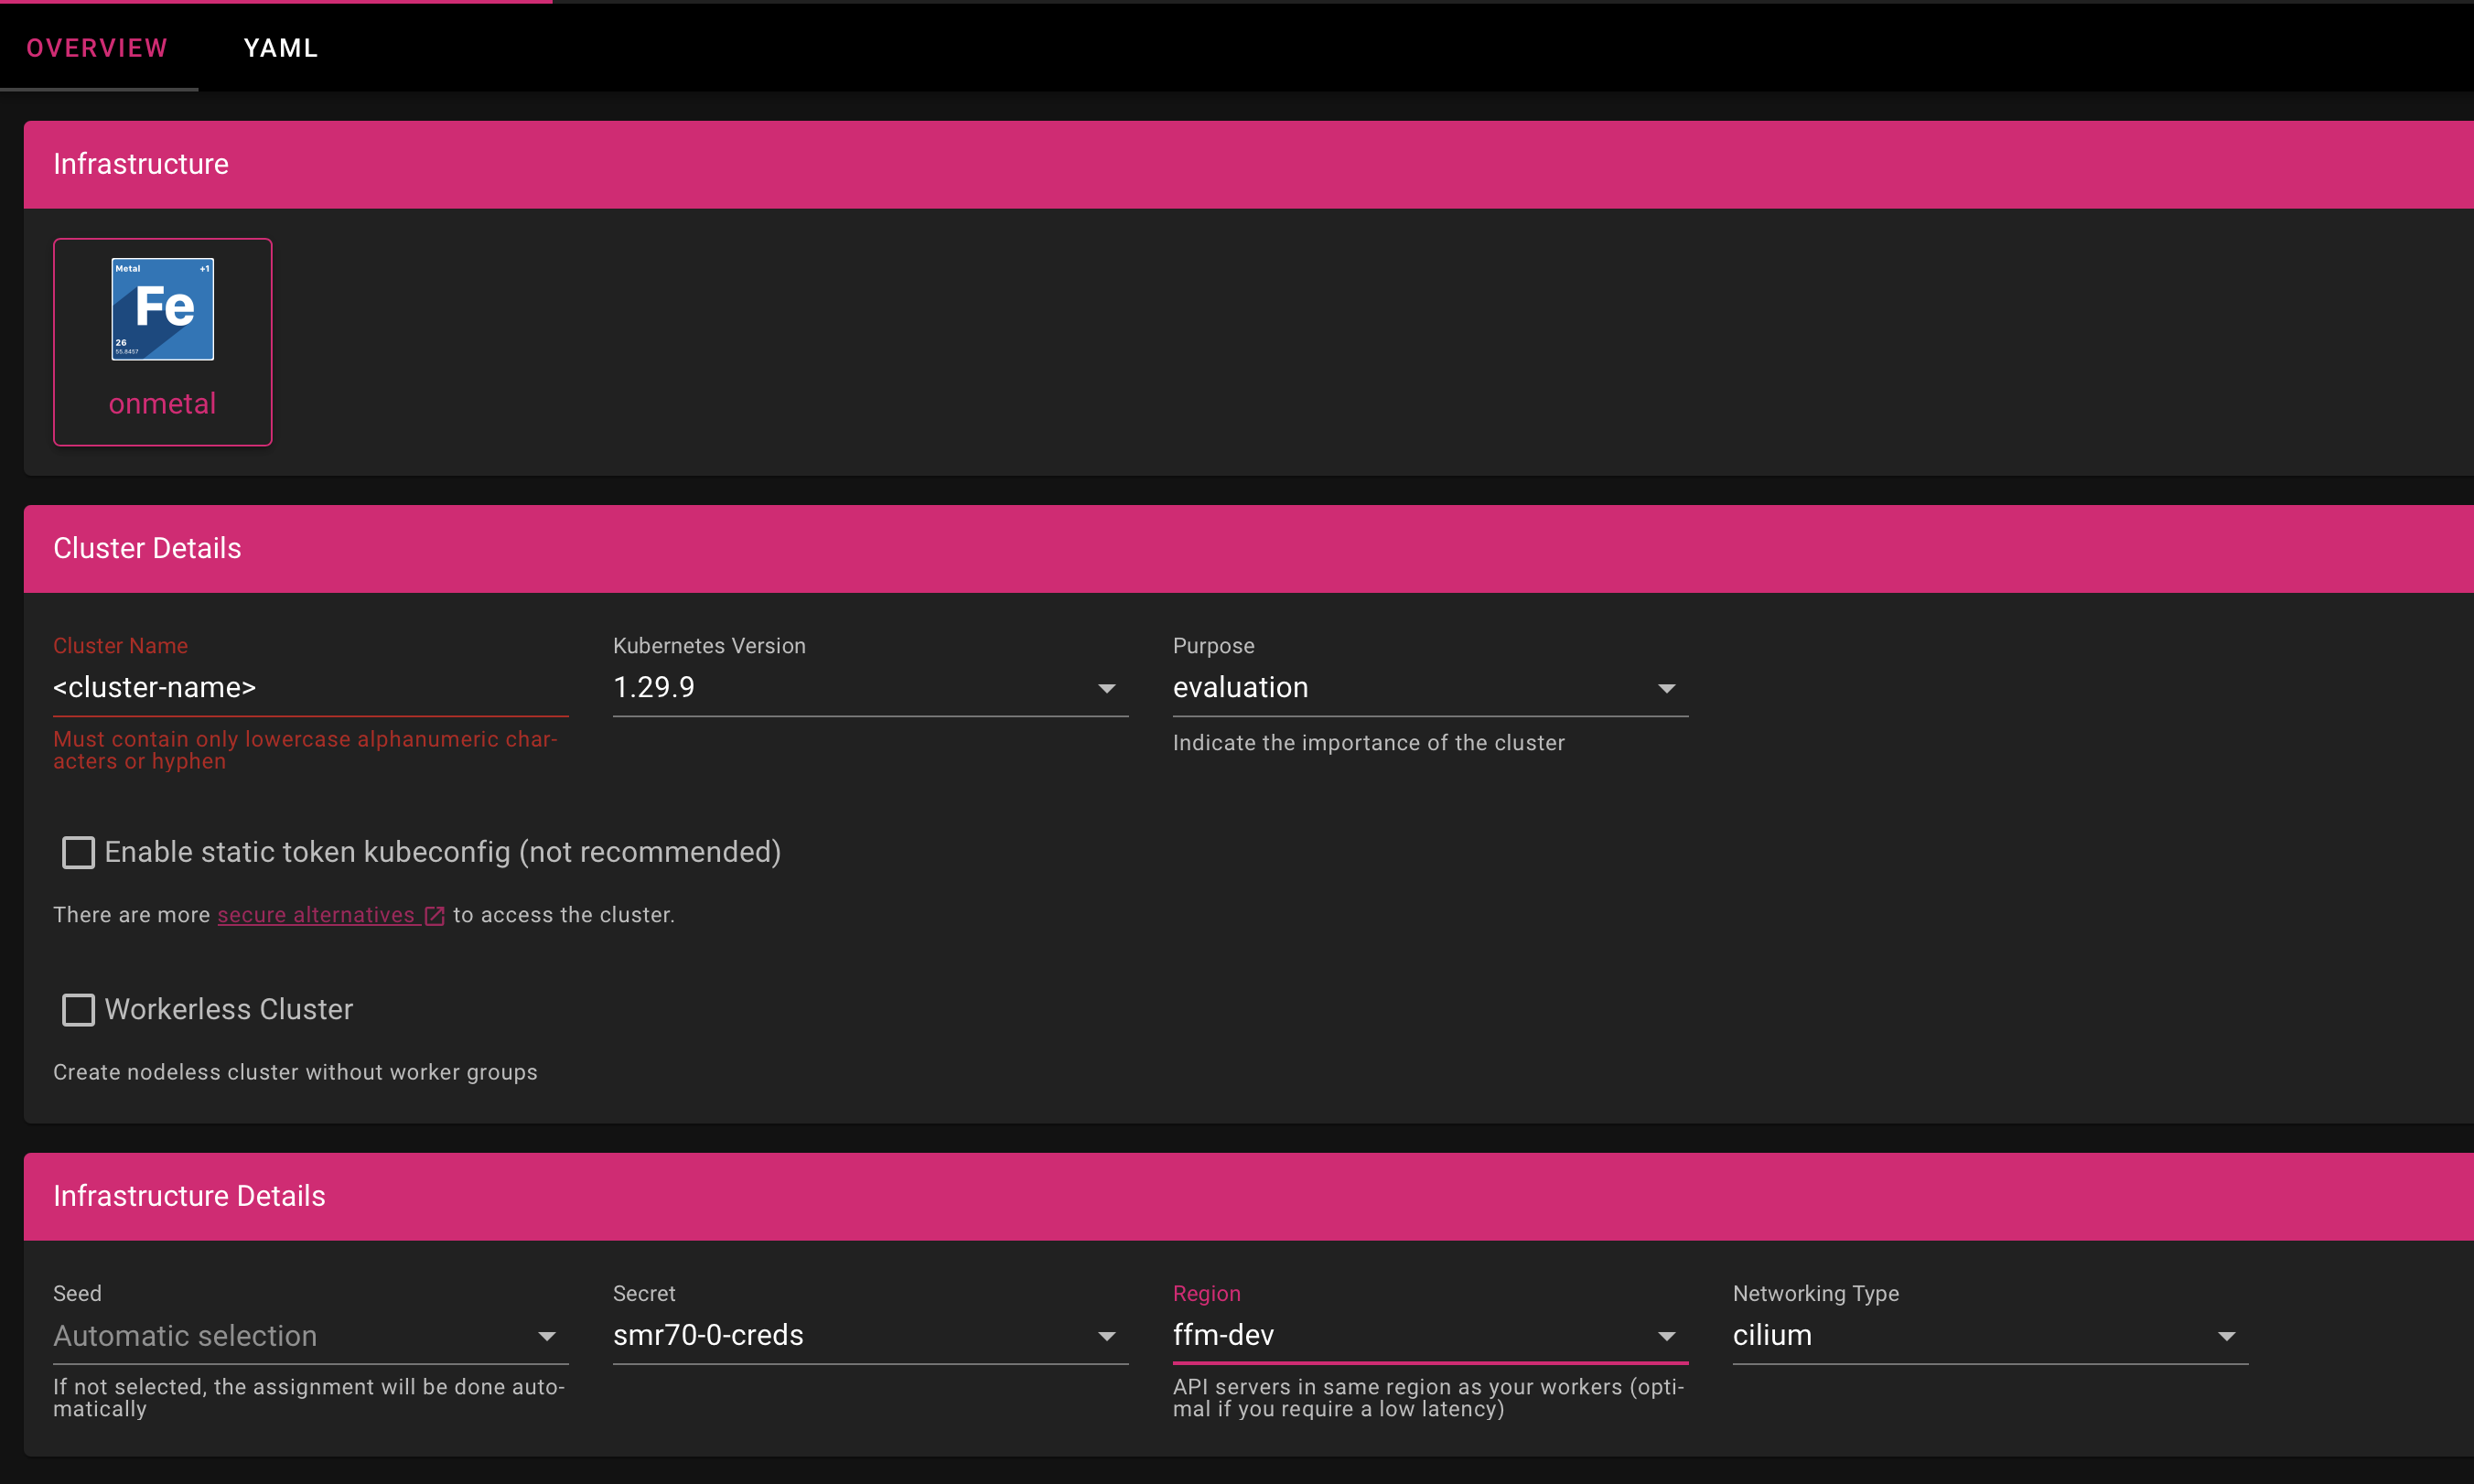
Navigate to the Clusters section and click the "+" sign.

-
Edit the Cluster name and use the pre-set secret.
Please keep Shoot cluster name as short as possible to prevent breaking 63 character limit for resources that are automatically deployed during Shoot cluster deployment based on Shoot cluster name.
-
Select a machine flavor. If deployment fails, try switching to another zone, as resources in the current zone might be used up.
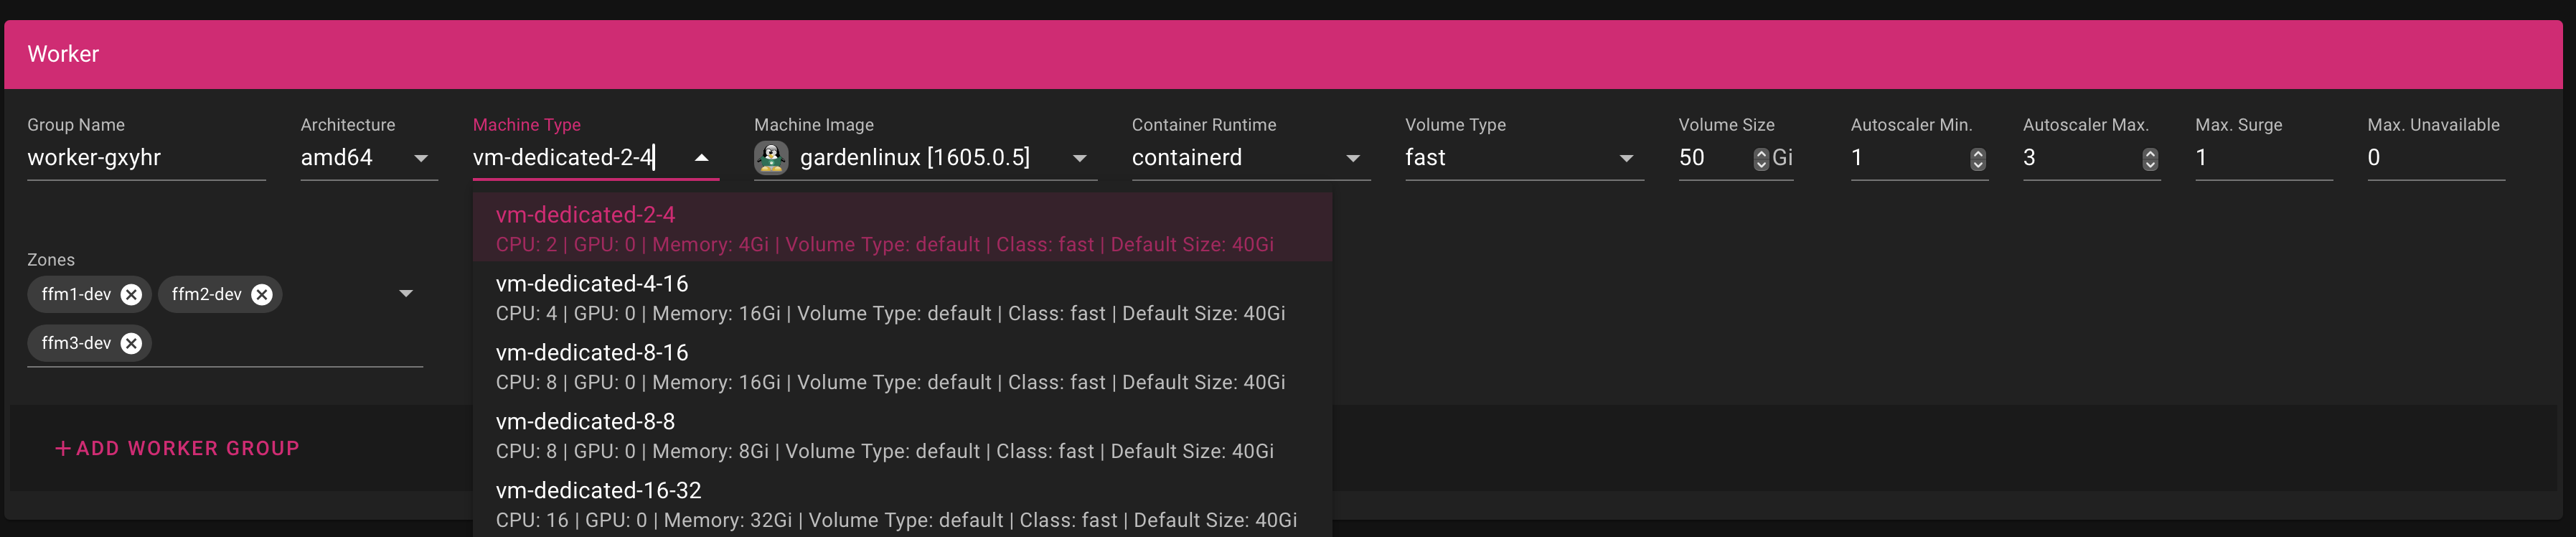
For additional information's about shoot worker-pool management, please navigate to the Shoot worker-pool management
-
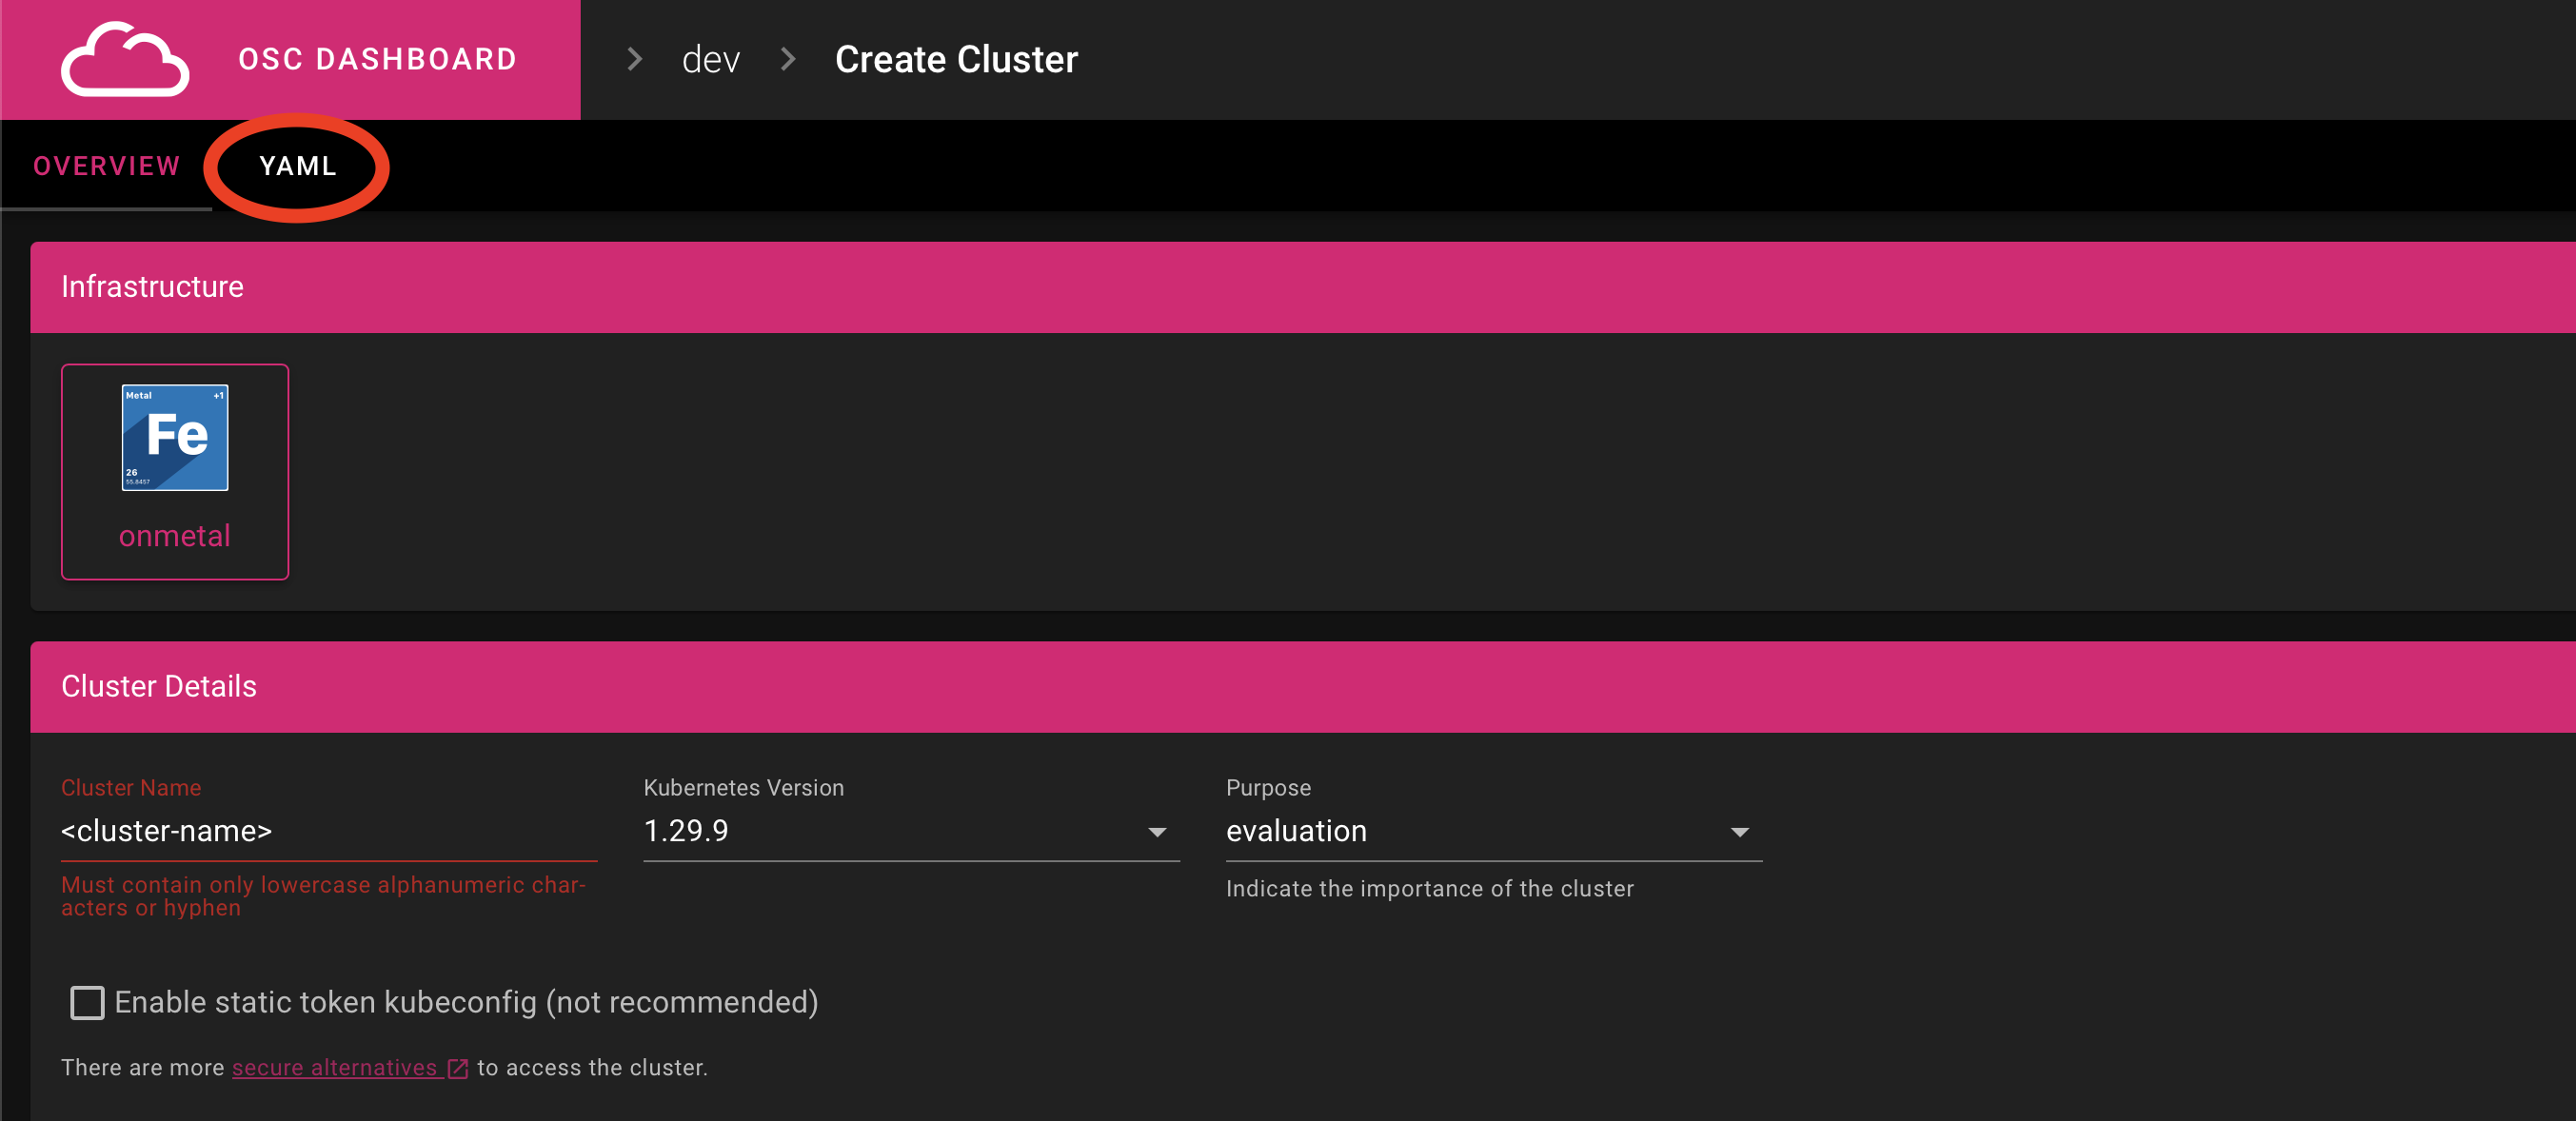
Switch from "OVERVIEW" to "YAML" at the top of the page.
-
Additionally, consider adding extensions:
spec: extensions: - type: osc-dexclient-service - type: shoot-dns-service -
At the bottom of the dashboard, click the "SAVE" button to initiate the deployment of the Shoot cluster.
Deploying using Manifest
To configure Shoot settings using a manifest, follow these steps:
-
Create a YAML manifest for the Shoot. In the upper part of the YAML definition, provide the name and namespace. The namespace represents the garden project where the Shoot object is logically located in the garden cluster. The format for the namespace is
garden-<myproject>(e.g.,garden-myproject).apiVersion: core.gardener.cloud/v1beta1 kind: Shoot metadata: name: <name of the shoot> namespace: garden-myprojectname- Name of the Shoot cluster. Please keep Shoot cluster name as short as possible to prevent breaking 63 character limit for resources that are automatically deployed during Shoot cluster deployment based on Shoot cluster name.
namespace- Represents the garden project (e.g., garden-myproject).
-
Specify the components and configurations in the
specsection, including:addons- Addons configuration.
cloudProfileName(Required)- Name of the CloudProfile.
controlPlane- General settings for the control plane.
extensions- Extension information.
hibernation- Information about whether the Shoot is suspended.
kubernetes- Control plane version and configuration.
maintenance- Maintenance operations settings.
networking(Required)- Cluster networking information.
provider(Required)- Provider-specific information.
purpose-
Purpose class for the cluster. Do not get confused by different field
seedSelector.matchLabels.purposedescribed here. region(Required)- Region name.
secretBindingName(Required)- Name of the SecretBinding.
seedSelector- Seed information for scheduling.
systemComponents- System component settings.
tolerations- Taint toleration for seed clusters.
controlPlane- Control plane high availability settings.
Deleting a Shoot cluster
There are two methods for deleting a Shoot cluster:
Warning
When you delete a Shoot cluster, it's important to note that the associated bucket will be deleted automatically. This is a default behavior to ensure the cleanup of resources. If you wish to retain data from the bucket, please follow the procedure outlined in the S3 Extension section of the user documentation.
Deleting a Shoot cluster using the Gardener kubeconfig is a straightforward process, similar to deleting any other object in a Kubernetes cluster. However, before you proceed with deletion, it's essential to apply an annotation to the Shoot cluster to disable accidental deletion protection. This annotation is crucial to ensure a smooth deletion process.
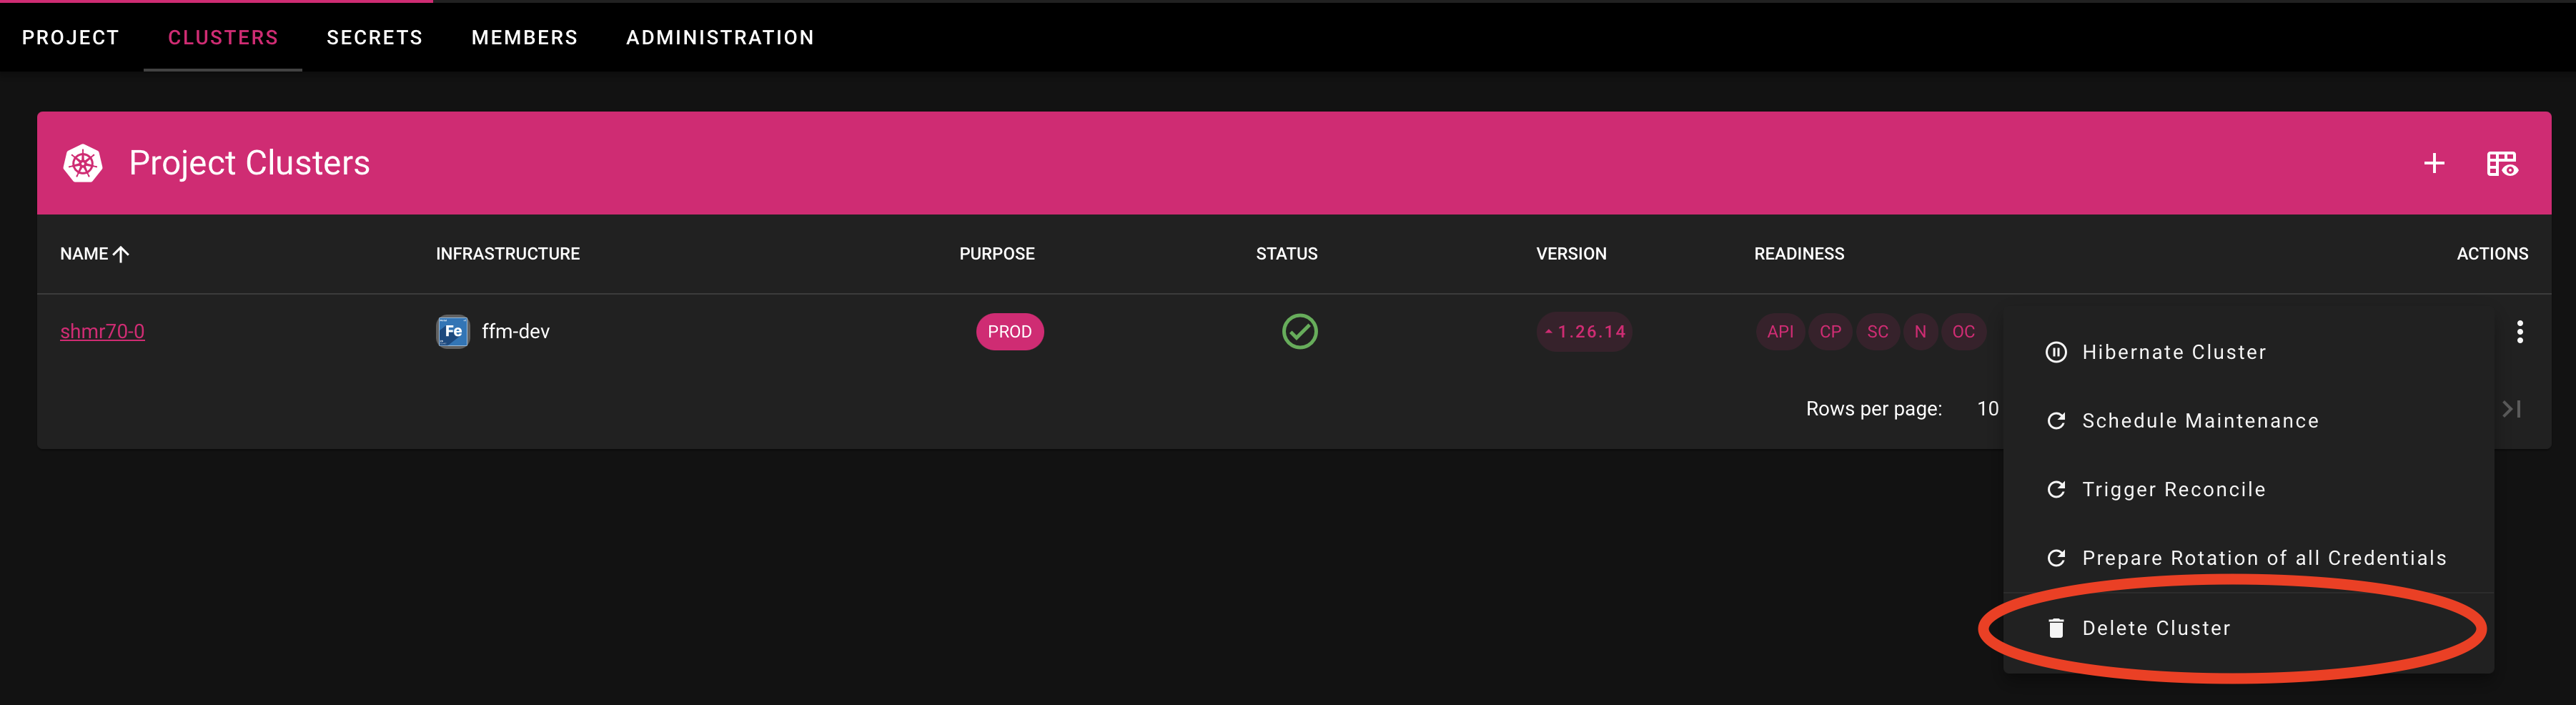
Deleting using the OSC dashboard
If you prefer a more user-friendly approach, you can use the dashboard to both apply the annotation and delete the Shoot cluster in a single step. This feature simplifies the deletion process for those who prefer a graphical interface.
Deleting using CLI or Manifest
-
To disable accidental deletion protection, use the following command with
kubectland apply it to the Shoot cluster:kubectl annotate \ -n garden-projectname \ Shoot/test \ confirmation.gardener.cloud/deletion=true -
Once the annotation is applied, you can proceed to delete the Shoot cluster
There are two methods to achieve this:
kubectl delete shoot/test -n garden-projectnameAlternatively, if you have shoot.yaml file you can use it to delete the Shoot cluster running the following command:
kubectl delete -f shoot.yaml